Easy Cricut Halloween Banner
Happy October!!! It’s been a busy couple of months, but I’m getting back into the swing of a routine! And routines mean… blogs!!
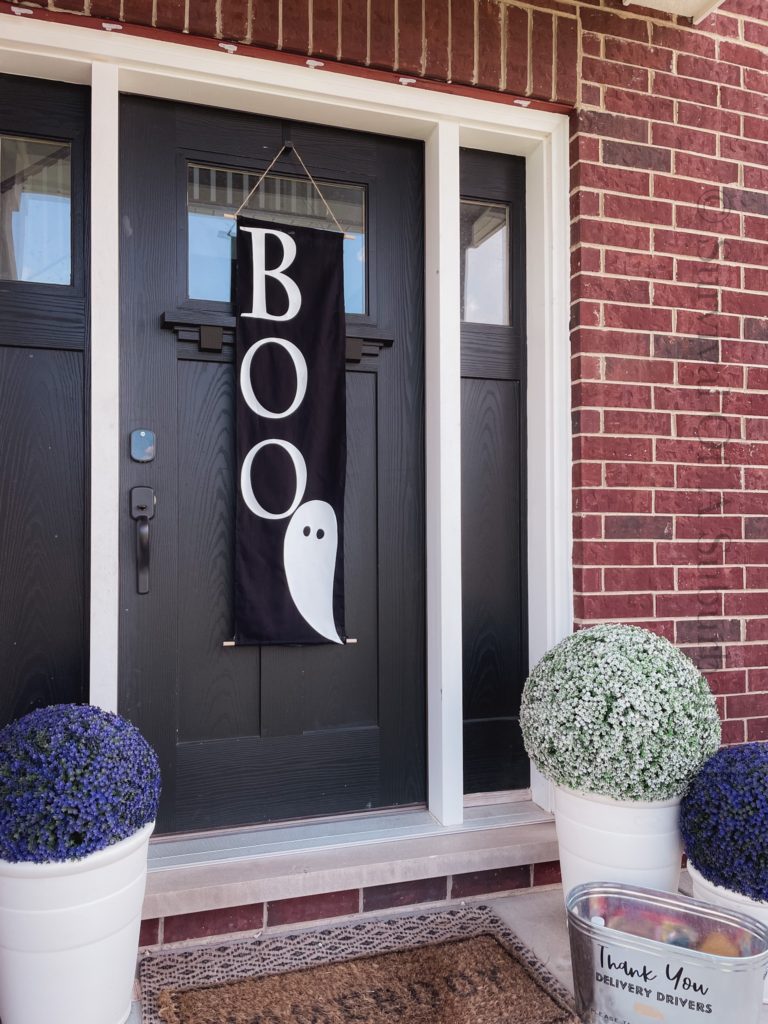
I love October, and I LOVE Halloween decorating!! What do I also love… my Cricut, and of course, easy DIY’s! So I thought I would combine all of those and throw together this Boo banner.
And here’s the details! First, I took a trip to Hobby Lobby, and grabbed some black fabric. Then I headed down the Cricut aisle and grabbed iron on vinyl. I recently upgraded to the Cricut maker 3, and it’s been a game changer. I am obsessed with the smart vinyl!
What is smart vinyl?! It’s Vinyl that’s compatible with the Cricut maker 3, and when using both there is no need for the Cricut mats!!!! It’s ammaaazinng!!
After my run to the craft store, I came home cut my fabric down. Plugged in my glue gun, and glued the sides of the fabric. I had a few wood dowels at home and used one on the bottom, one on the top.
Taking a piece of twine I tied it to the top dowel. This way the banner can be hung.
Using the Cricut software I was able to find a free font, and a free picture of a ghost. After they were printed I ironed them on with the Cricut easy press. Annnnnd that’s it!
A easy Halloween decoration that was done in less than an hour, and was budget friendly.
Looking forward to more spooky DIY’s!! Have you made a fun diy for Halloween, if so, I would love to hear your idea below!
