Quick, Easy DIY Fall Wreath
Yay!!! It’s officially Fall!! And if you’re like me, you started decorating for fall a few weeks before. If not no worries, because here is this awesome DIY wreath you can do for the Fall. I’ve created a quick and easy DIY fall wreath that is pretty simple. I absolutely love fall, everything about it. All that being said I have to get this off of my chest I do not like Pumpkin Spice anything( I know right, that’s like a fall no-no). Therefore I do adore a good sweatshirt and a crisp morning, not to mention the changing leaves… it just leaves me feeling so happy and warm inside.
Now moving forward let’s get down to how I made this little fall gem! So you can go ahead and get your craft on with this fall wreath.
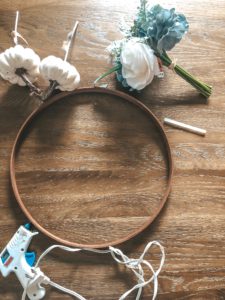
Supplies
- Glue Gun/Glue Sticks
- Embroidery hoop ( I used 14″)
- Mini flower bouquet
- Ribbon
- Pumpkin Picks
- Stain (Optional)
- Cup of tea(Optional :))
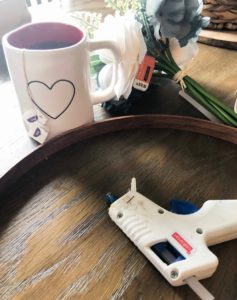
Step 1

Let me say, this step is a totally optional step, but I stained my embroidery hoop. Which I buy an embroidery hoop because , I think they’re around 3 dollars, and I can make two wreath from it since it has the inner and outer circle. For the stain I used Is Minwax Bombay Mahogany. After I stained it I let it dry, I let it dry overnight before I got back to it. You could let it dry for an hour or so and I’m sure you would be fine.
Step 2
Grab the rest of the supplies, flowers, glue, glue gun, pumpkin picks and the embroidery hoop. I found this mini flower bundle at Michaels craft store on sale for $5. Let me add I love using these little bundles, because it seems to be cheaper, and they’re already bundled in a good color scheme for these wreaths. For that reason, it makes things easy, cheap and fast!
Rather than just glueing everything on blindly. I took the flowers apart from the bundle and I started to place them on the embroidery wreath with the picks, just to get a generalization of how, and where I wanted everything placed.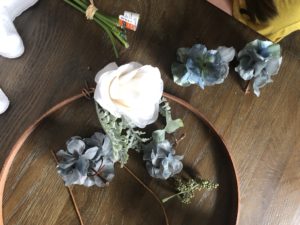
Once I figured where I wanted everything it was time to glue all of the flowers and the pumpkin picks onto the wreath form.
Step 3
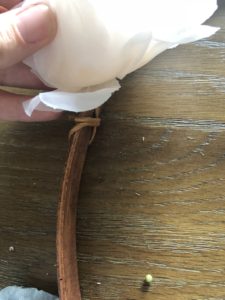
Third, time to attach to the embroidery hoop. The roses and the pumpkins I was able to leave on the floral wire and just tightly wrap them around the hoop, without using any glue. For the other flowers, berries, and leaves I had to glue them onto the hoop using the hot glue gun.
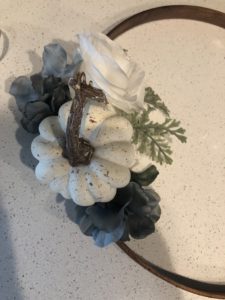

After I was done glueing and wrapping the floral picks onto the embroidery hoop I attached about a 16″ ribbon onto the embroidery hoop to hang from my door. I glued the ends of the ribbon together, and just placed a piece of tape on the back of my door to hold the ribbon in place. Because that was the easiest way to hang (and no one sees the back of this door anyway). Therefore depending on where and how you plan on hanging this wreath I would just plan where you want the wreath to lay and measure the ribbon from there. 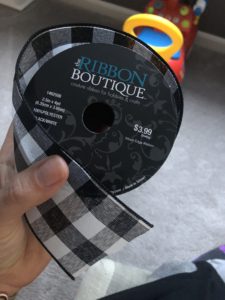
First of all is anyone else completely obsessed with the buffalo plaid print? I hope it never goes away. I found this adorable buffalo plaid ribbon at Hobby Lobby, for 50% off making it $2 dollars for the roll.
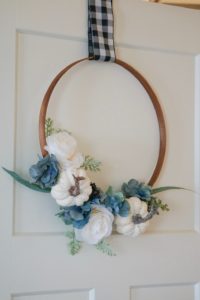
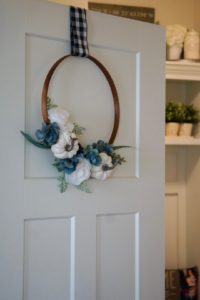
This wreath is super easy and cute. Above all I’m beyond in love with it! Please feel free to comment below if you try this wreath out, or if you have some fall craft ideas you got in mind!
If you’re looking for even more DIY projects feel free to check these out:
- DIY Kids Artwork Storage
- DIY Cute pedestal stand
- DIY cute spring wreath
- Adorable Summer Fun Wreath
- DIY Shelves
- Quick and Easy Fourth of July Wreath