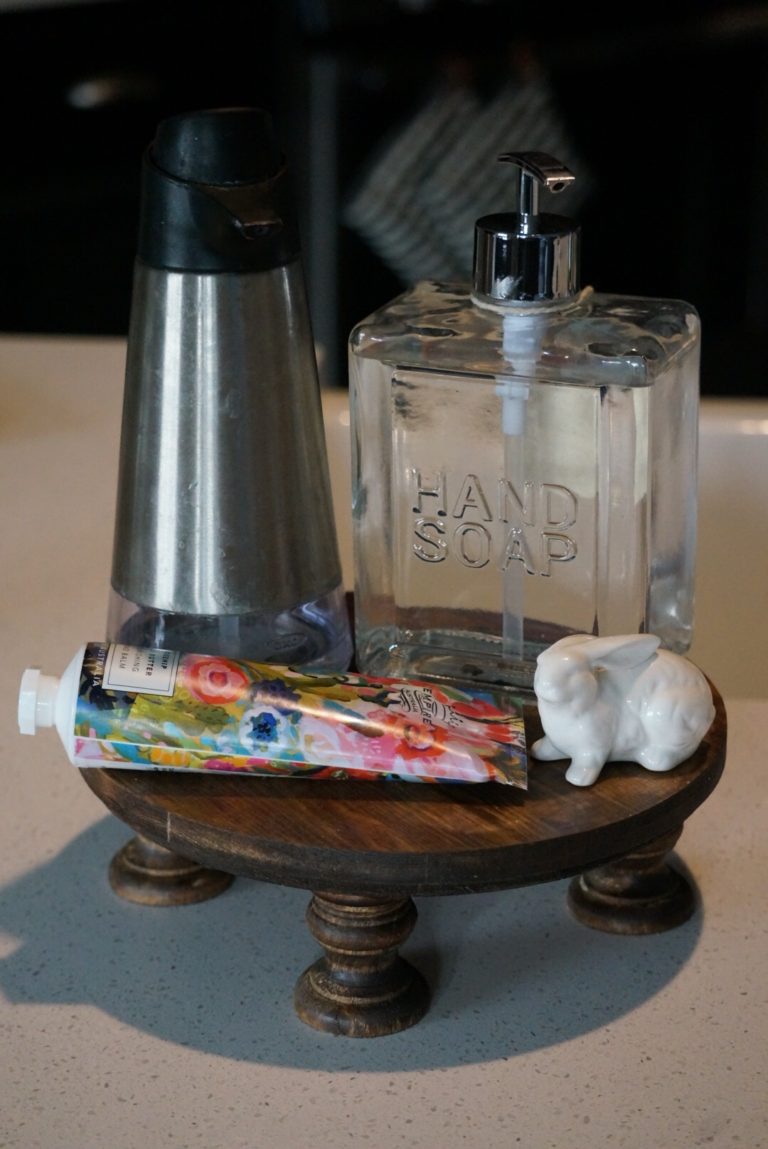
Shelves, Decorate, and DIY
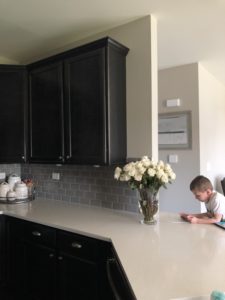
I did a small home update project that I thought I would just share, a little easy DIY. I have this space in my kitchen I couldn’t figure out what to do with, but wanted to do something with it!! It was driving me nuts, until it came to me… Shelves, I’ll put some shelves up!! The problem was I couldn’t find any shelves to put in this small space above the flowers. I’m such a perfectionist when it comes to things, so believe me when I say I searched for days, and nights for the perfect shelves to match my kitchen. But I kept coming up empty-handed, I was back at the drawing board. Until I decided I would bite the bullet and just make my own, which let me tell you ends up being way cheaper.
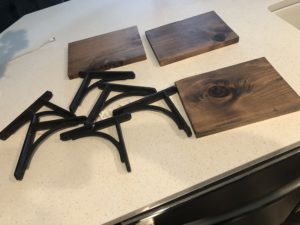
The first thing I had to do was find brackets that I liked, that weren’t outrageously priced, because on top of being a perfectionist I’m also pretty frugal, and I love to be as cost-effective as I can get(It’s like an adrenaline rush for me, I know I’m a pretty big nut… saving money and diying like an instant high for me!!) So I did end up finding my brackets at Hobby Lobby, 50% off metal decor ( which is like every other week) They did have others to choose from, and I actually went in to buy a different pair, but they were sold out, which I’m glad they were because these turned out way better! After I found my brackets I stopped at Home Depot and grabbed a common board which cost me under $10. I had it cut down to the sizes I needed, and now I have some left over, which I’m thinking I’m going to use for another DIY project really soon (stay tuned)!
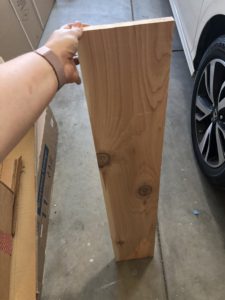
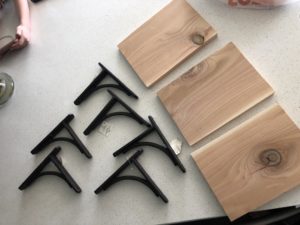
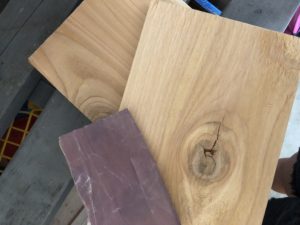
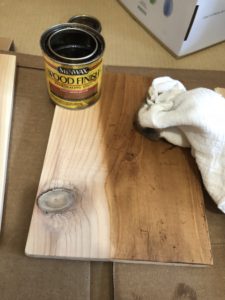
After they were cut down it was time to sand, stain and throw a couple of coats of polyurethane on them. I sanded them on both sides and edges, and I just grabbed a piece of scrap sand paper I found lying around the garage( so no need for any special grit) I just wanted to give the edges a little more of a rustic rounded look. Sanding before you stain is a crucial part of staining wood, because the wood absorbs the stain easier than unsanded wood. For stain I just used Early American by minwax, I only did one coat to each side, and edges, and just let dry for a few hours. After they were dry I added two coats of Polyurethane to each side and edges, letting them dry an hour or so in-between coats. After that I just let them dry over night.
The next day, I was ready to have them hung, and to be honest, I did not hang them myself. I made my husband do it, and just like most husbands, he wasn’t happy about any extra projects I gave him, and probably the fact I watched his every move as he hung them up. It wasn’t like I was trying to criticize him or anything, I just had vested a lot of time and effort into these damn shelves, and I was hoping that they turned out exactly like I pictured in my head( the perfectionist in me)
So as he sat there hanging these shelves for me I was sitting in the background saying things like “Oh Yeah!! Look at those shelves!!” “Oh My God, they’re wonderful” needless to say I was happy about the way they turned out! On another note, who knew someone could get so excited about some shelves??
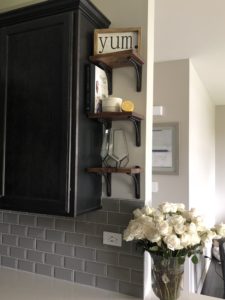
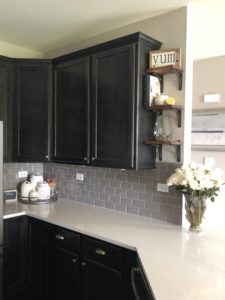
Here these DIY shelves are costing me just about $30 dollars!!! I’m just in love with them, all the new little decorating trinkets I’m going to buy!! Target Dollar spot better watch out, because I’m coming to decorate with their super cute seasonal decorations that I’m also obsessed with!!