DIY Basement Fireplace With Modern Blaze’s Recessed Electric Fireplace
I am so happy to report that the basement fireplace project is complete!! It took a little bit longer than I anticipated, but thats the fun in DIY ;), especially when there is a pandemic going on.
Now that it’s officially finished and decorated, it’s time to share all the details. My theme in life, comfortable and cozy. Don’t take me anywhere that requires heels and a parka, please! Honestly, I apply that to everything in my life, I want it to be cozy and comfortable. This year I’ve been taking a lot of time and energy to make sure that happens in our basement.
What better way to make a basement cozy than adding a fireplace!! Especially, because our basement usually is ALWAYS cold! How was I going to add a fireplace in our basement with out it costing a fortune… an electric fireplace. When an opportunity arose to work with Modern Blaze, I knew they would be a great fit in helping achieve my basement dream goals… cozy and comfortable!!!
Choosing the Best Fireplace
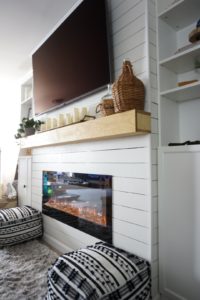
Modern Blaze really went above and beyond to make sure we were getting exactly what we needed for our space. With a ton of choices to choose from, such as, Electric, Water Vapor, Ethanol, Ventless Gas Fireplaces I wasn’t sure what would be best. Since this was going in our basement, the electric fireplace was our best option. Once we determined what type, it was time to determine size, shape, functions, mounting capabilities, who knew there was so many decisions . Modern Blaze, really helped narrowing down my search, and helped me choose our best option. We ended up with the 50′ recessed electric fireplace which I couldn’t be happier with, it was a perfect choice for our space!
Let’s Build The Wall Out
Fireplace picked out, and arrived, we were officially ready to get down to business! Since we chose a recessed fireplace we needed to build the wall out. Up first, measuring exactly where we wanted this fireplace to go, and making sure it wasn’t too close to the floor, or to the mantel. We also needed to figure out the width and depth of the build out, and where we wanted the mantel height to be.
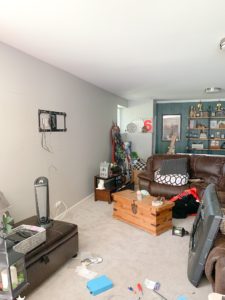
Building the wall out… the fun part! Using 2×4’s we created the frame, and a 1×6 to attach the mantel to. Once the wall frame was built, we attached the fireplace and moved the electric up, hardwiring the electric fireplace (Since we our putting a tv above the mantel)
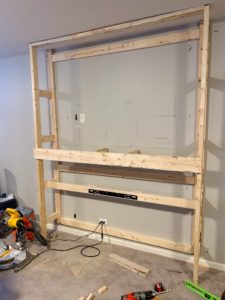
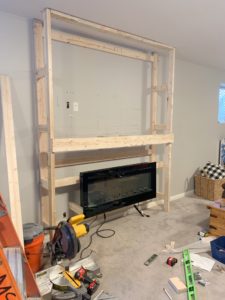
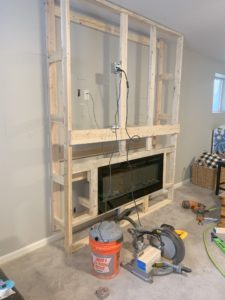
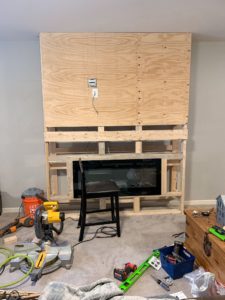
When we measured out the frame, we made sure we were building on the studs. Especially, because we knew we would be putting a tv above our mantel. The electric box was moved to a 2X4 above where the mantel would be. Measuring where the tv frame would sit we added another 2×4, so we would have support, for the tv frame. After that we placed a piece of plywood above the top half of the build out.
Shiplap Time!
Wall build out, done. Fireplace recessed. Electric moved. What’s the most budget friendly way to transform a room.. shiplap of course, so why not shiplap our new fireplace?!?! We bought 1/4x4x8 sheets of plywood and stripped them down into 4 inch pieces. I’m not going to lie, I wanted 6 inch shiplap, but my hubby didn’t hear me. Before I knew it, they were 4 inch strips… but…. in the end I am so glad we did 4 inches, because I think it gives it more of a modern look, and makes the basement ceilings look taller. Using a nail gun we nailed them into the frame.
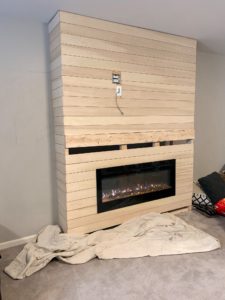
Time to paint, I used Sherwin Williams, Alabaster (Seriously, my favorite white ever!!) and did two coats.
Hello There Mantel
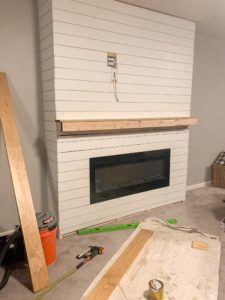
So close to being done that I can almost feel the cozy nights in the basement. For the mantel we used 1×6 common board, nailed together on three sides, to make a sleeve. We had built 2×4’s to come out, and the 1×6 common board slid onto the 2×4’s and were secured with screws.
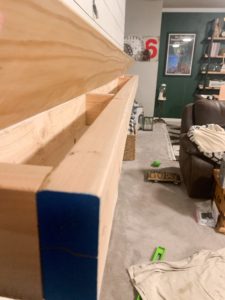
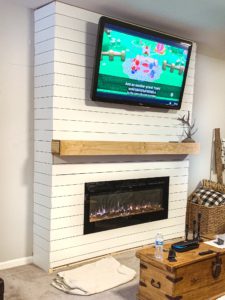
Staining the mantel, was a bit tricky, I was going for a light honey, golden look with some grey undertones. Mixing a few different combinations of stain before getting it just right. I ended up using 1 part Weathered oak, and 2 parts Golden Oak. Once the 1×6 sleeve of the mantel was stained and dry we secured it to the 2×4’s and it was love! Total head over heels love!!
The Build In’s
The fireplace was done in May, but I wanted to have build ins, and didn’t want to spend a fortune! Gotta love a budget! I turned to my favorite place to find dependable furniture on a dime, IKEA! I found the Billy Bookcases, and the height extension kits that ended up working perfectly, matched the Sherwin Williams Alabaster white I used on the fireplace, and were super budget friendly. Because of Covid Ikea was closed, and they wouldn’t be delivered until the end of June. It was sad, but when life gives your lemons, sometimes you just have to wait it out!
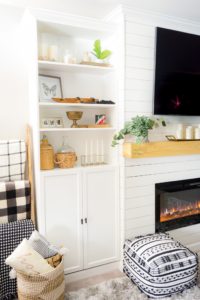
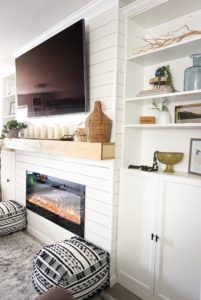
When I finally saw the email that said they would be delivered, it was like Christmas morning! The day they were delivered, I couldn’t wait to get them built, and up!! I changed out the hardware to some black hardware I found on Amazon. Then after adding trim to the bookcases, and the fireplaces we were officially done!! And all my fireplace dreams came true that day!!
The trim was added to the top and bottom of the bookcases, and the fireplace build in. As well as slim straight piece of trim to the back of the bookcase where it met the wall so there was no seems.
All My Cozy Dreams
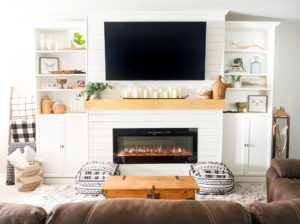
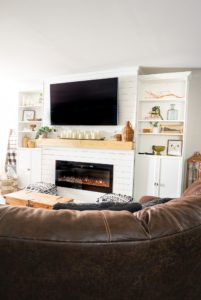
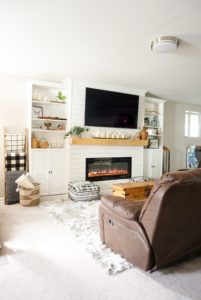
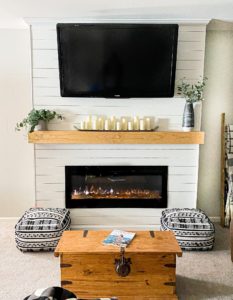
After the build ins were in, and the trim was up, it was officially time to decorate and add those last minute touches! Now time to sit back and enjoy… or dream up another project!! Wanted to say a big Thanks to Modern Blaze for gifting us the fireplace to make all these dreams come to life!!
