Outdoor Play Area Solar String Lights
Summer break is in full swing here. Those late nights, no schedule, S’mores and running the block! I’m not going to lie, I can’t deny the fact that this summer has been a bit busier. with the world going back to some type of normal things are moving fast!!
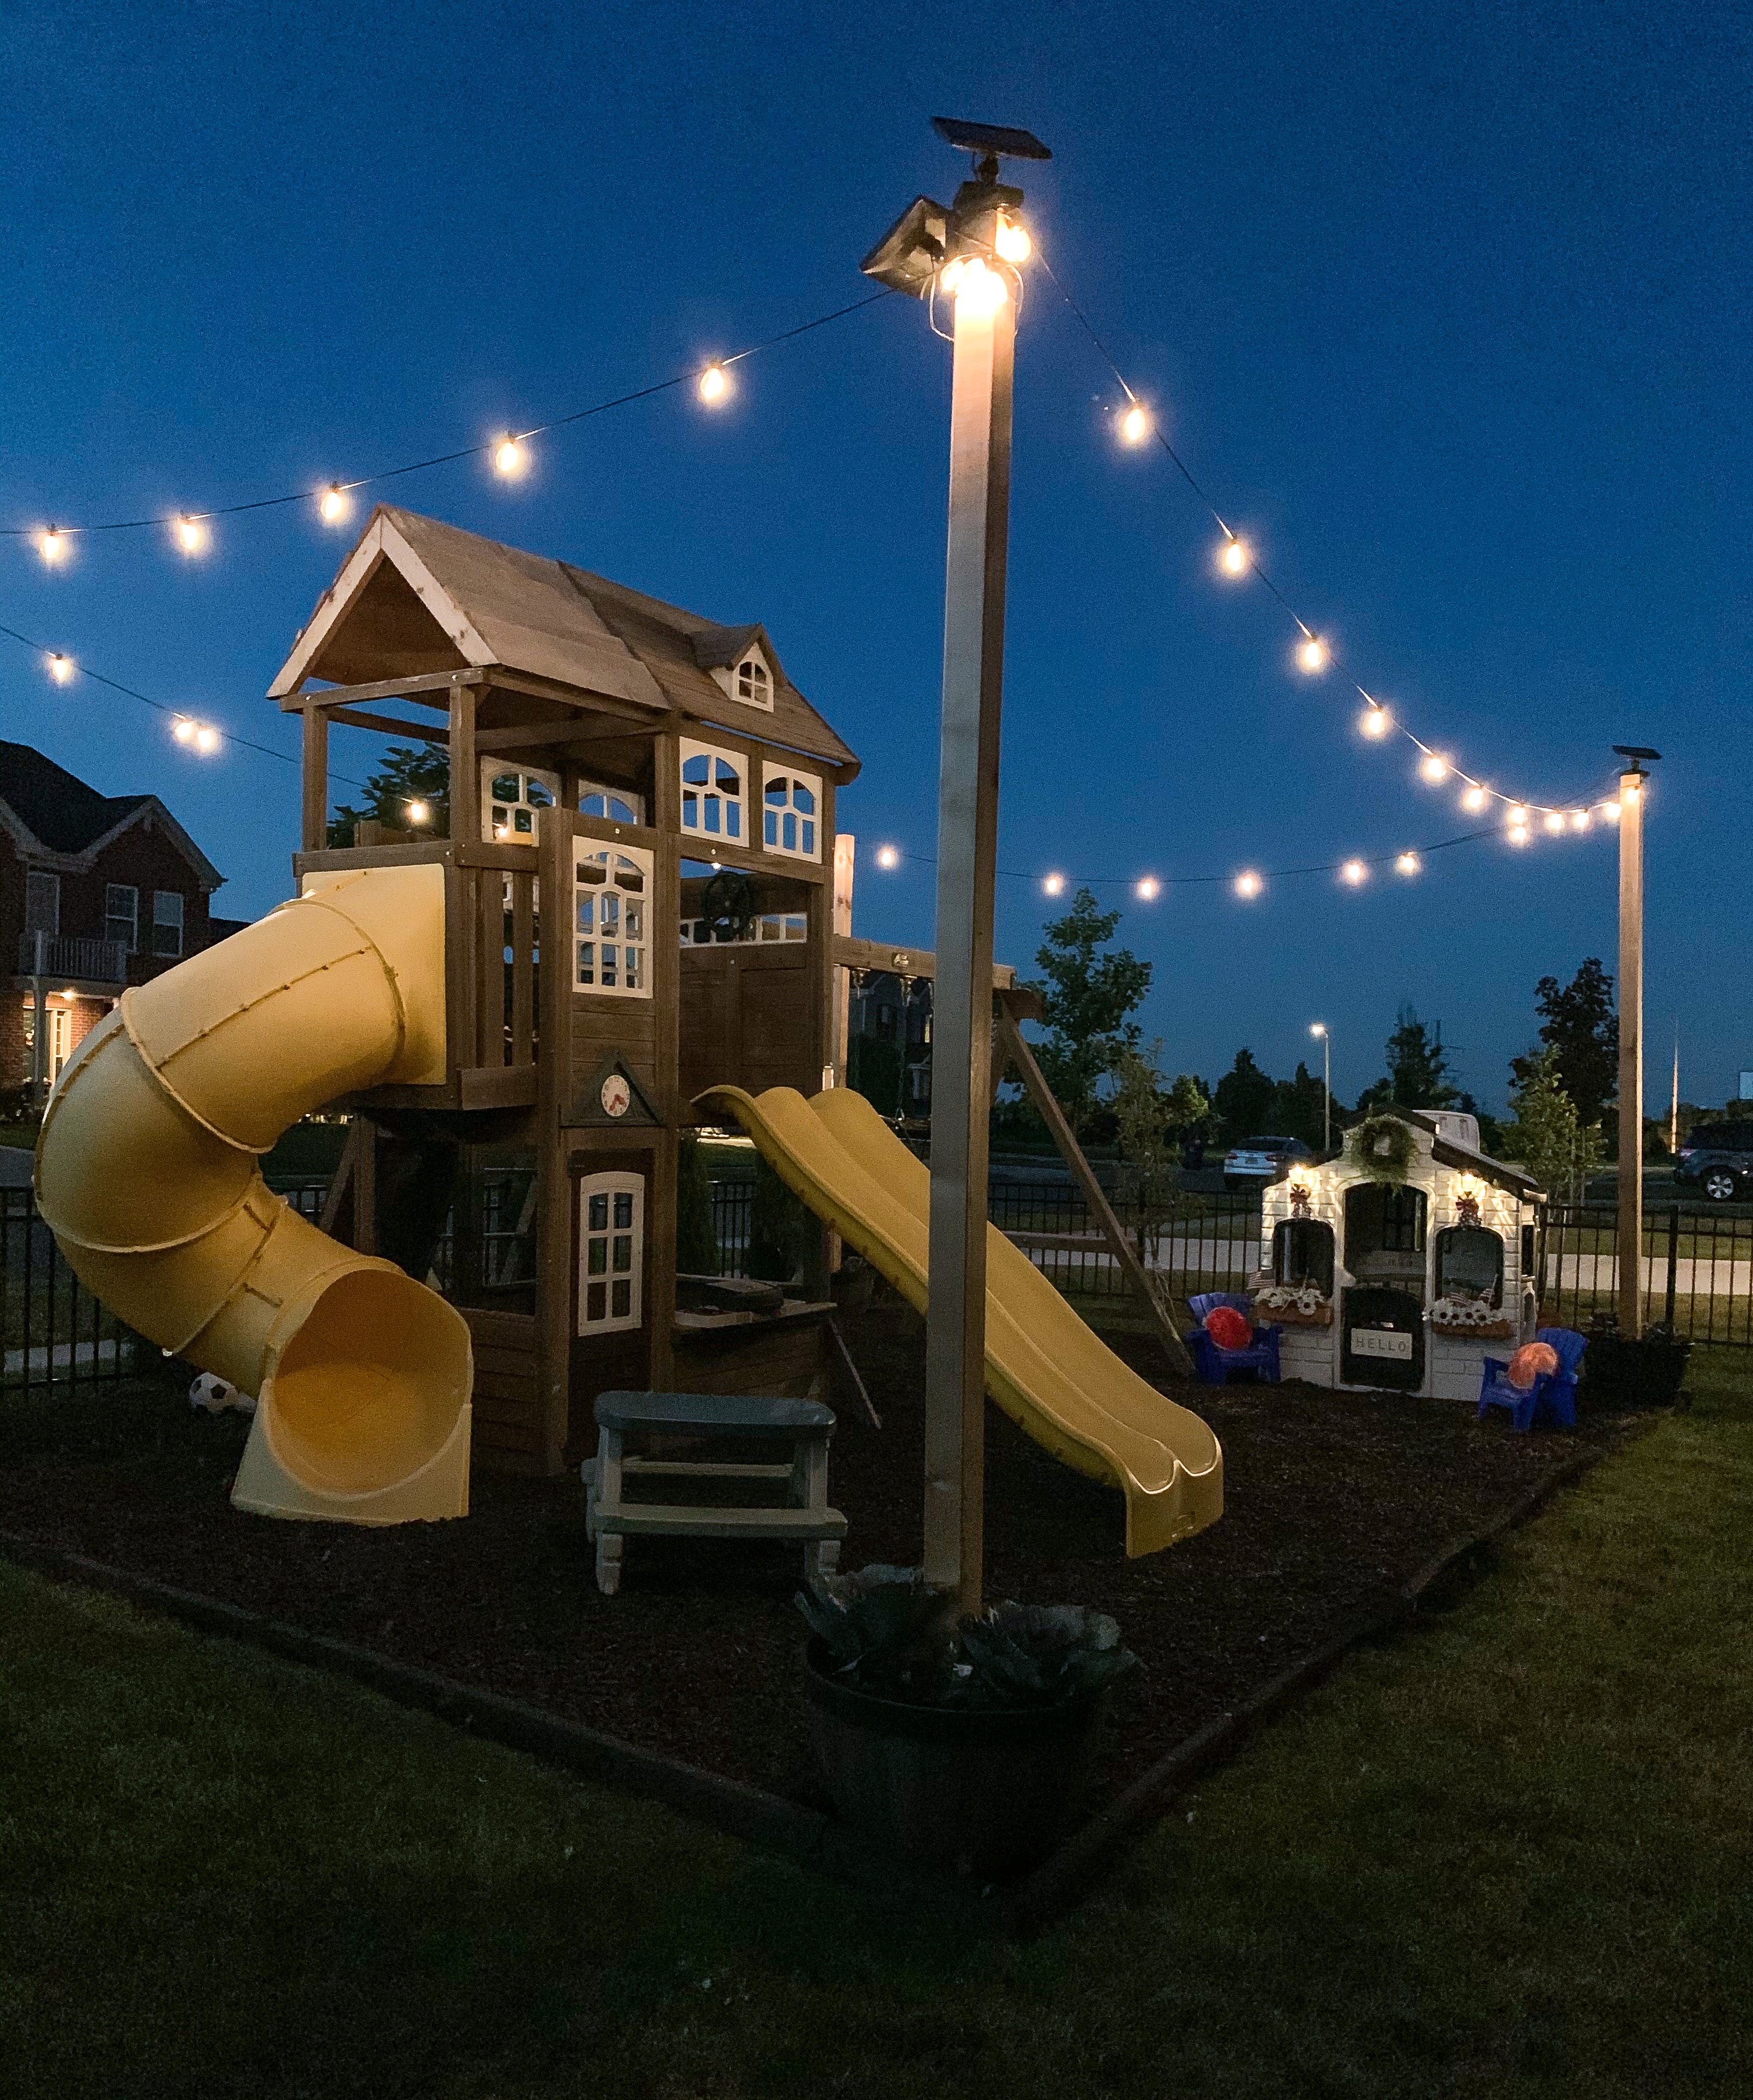
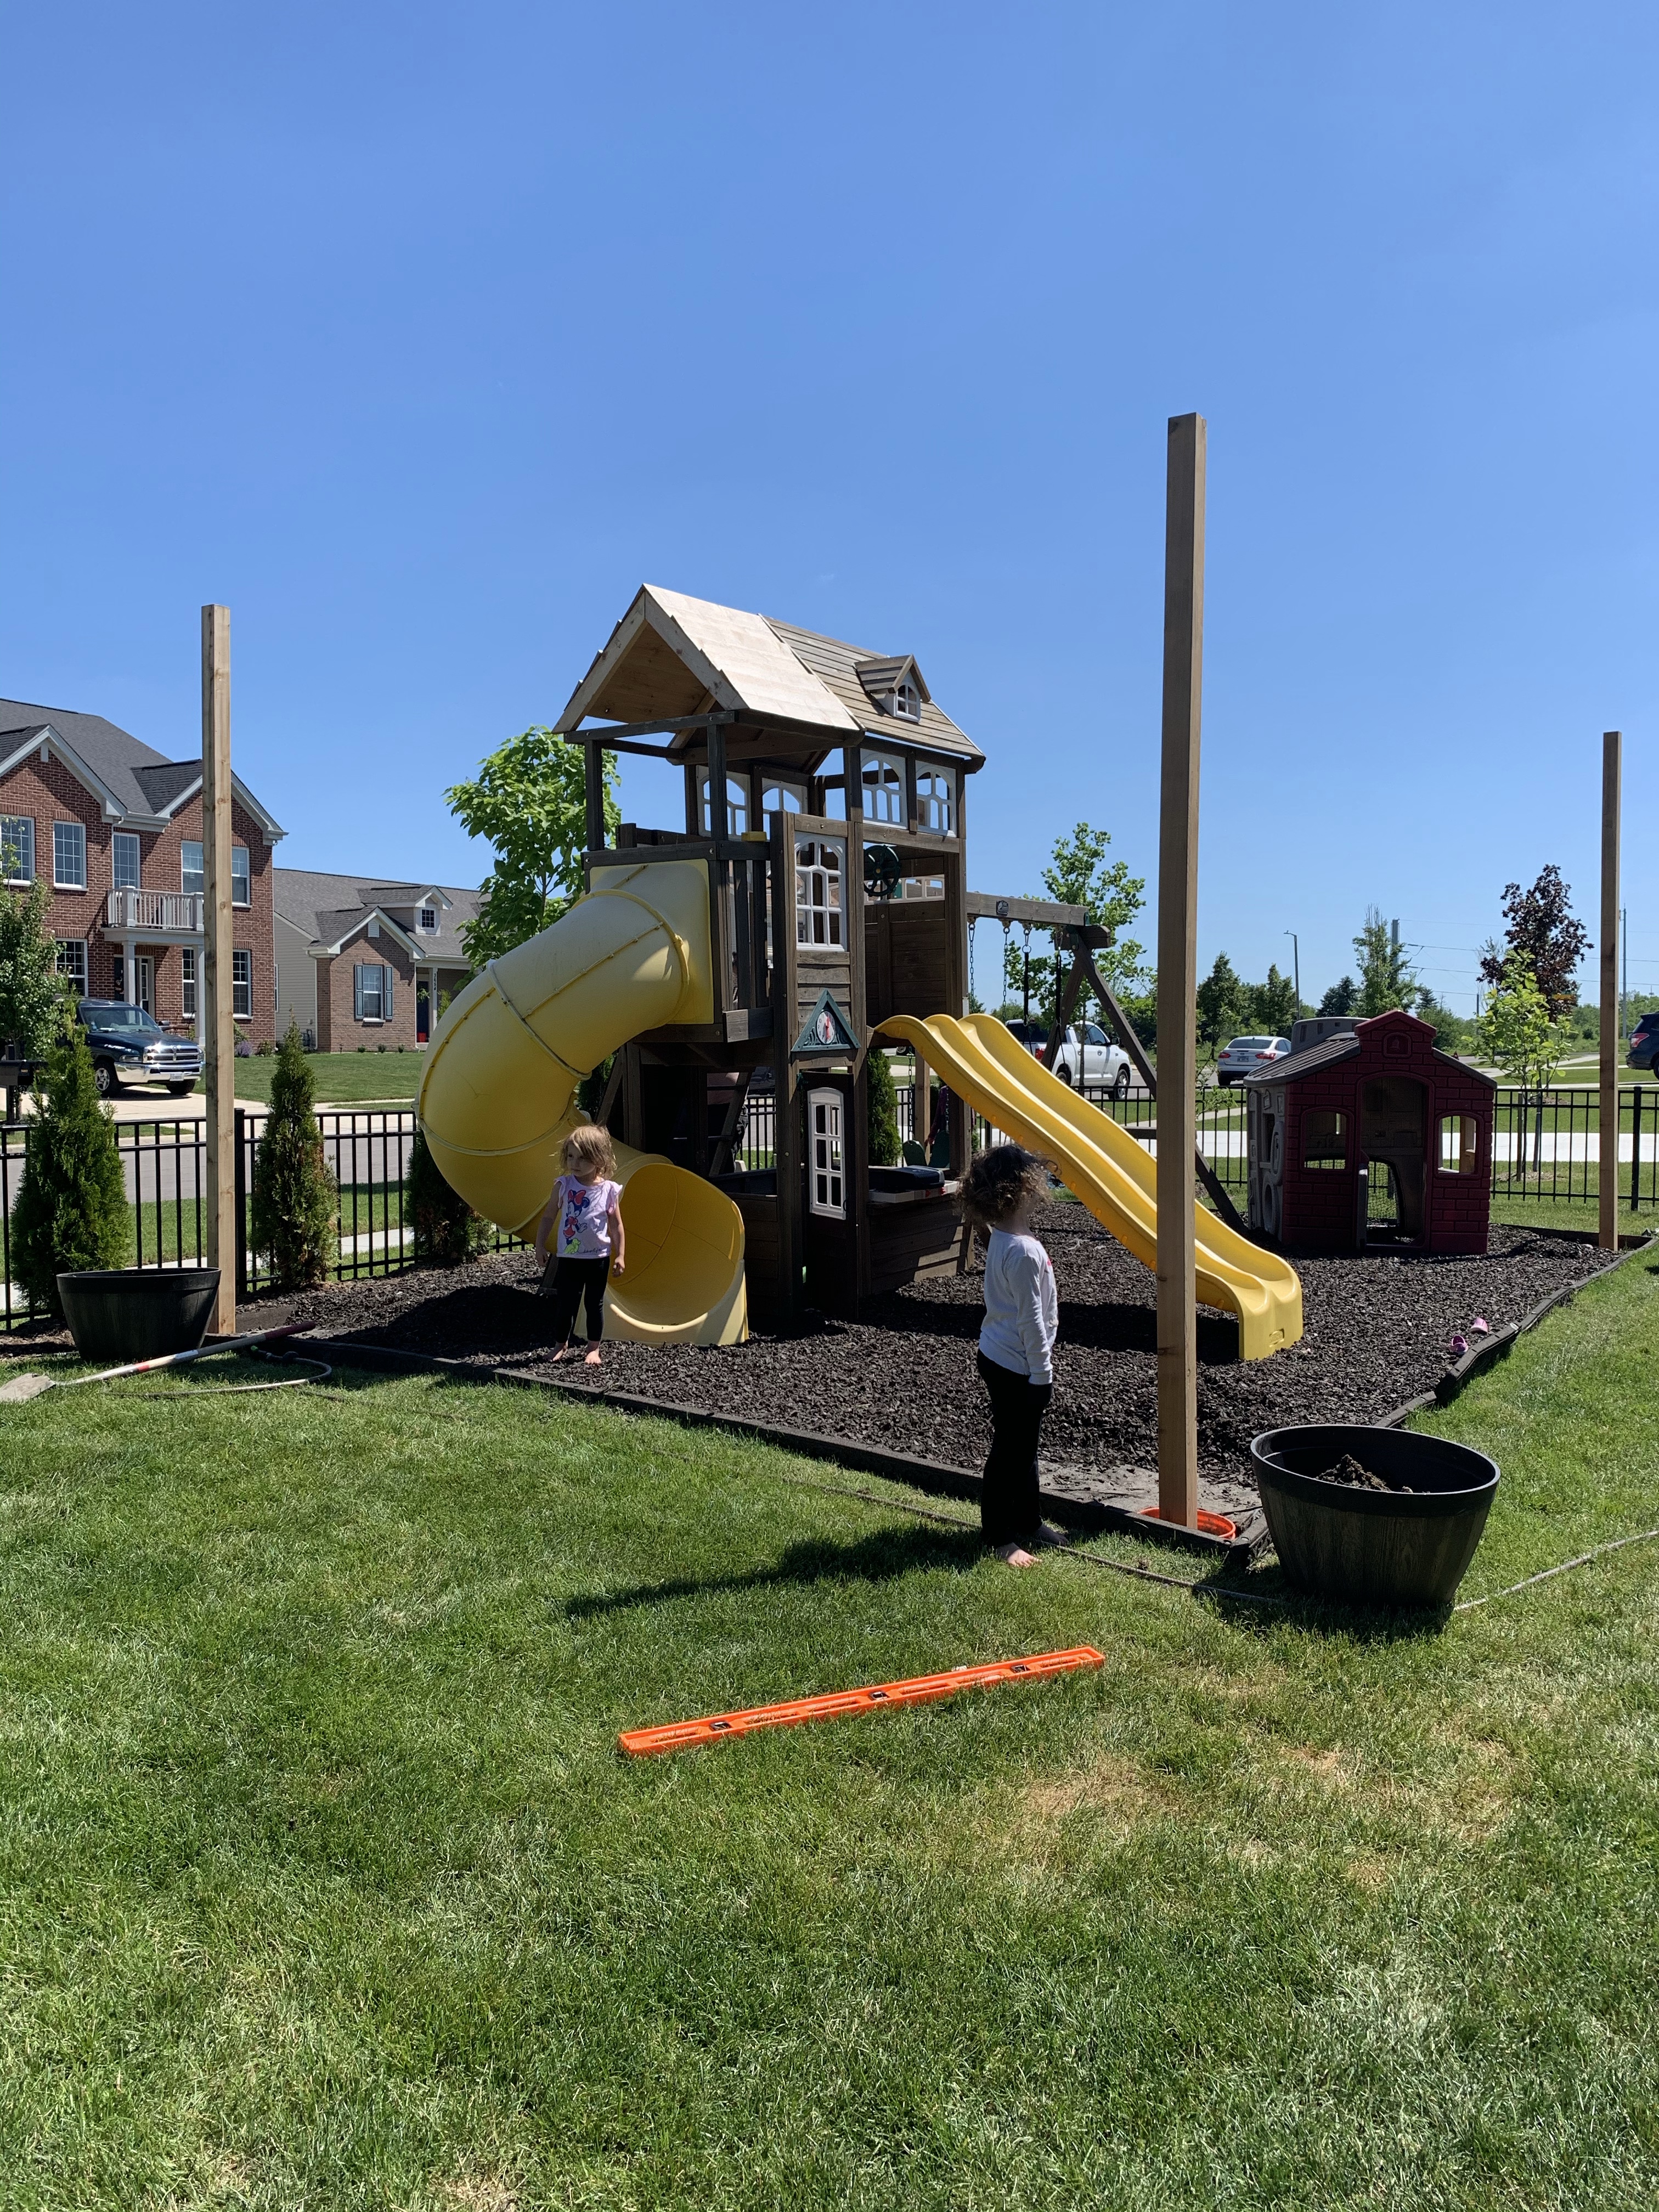
Last summer, I had a lightbulb idea, literally… its always so dark by our swing set, and the side of our home. The kids had a hard time seeing and playing when the sun went down. It was impractical to run electric, or plug in any lights. Coming up with a design that was functional, and magical, without being messy.
So, when I found solar string lights, I was over the moon! And the rest was history!
Project Time!!
After purchasing three sets of the solar lights at Costco ( you can also find them linked Here ) we purchased 4 cedar posts 16 feet long, two bags of quick setting concrete, and 4 planters. We also used 4 orange buckets from Home Depot that we had on hand.
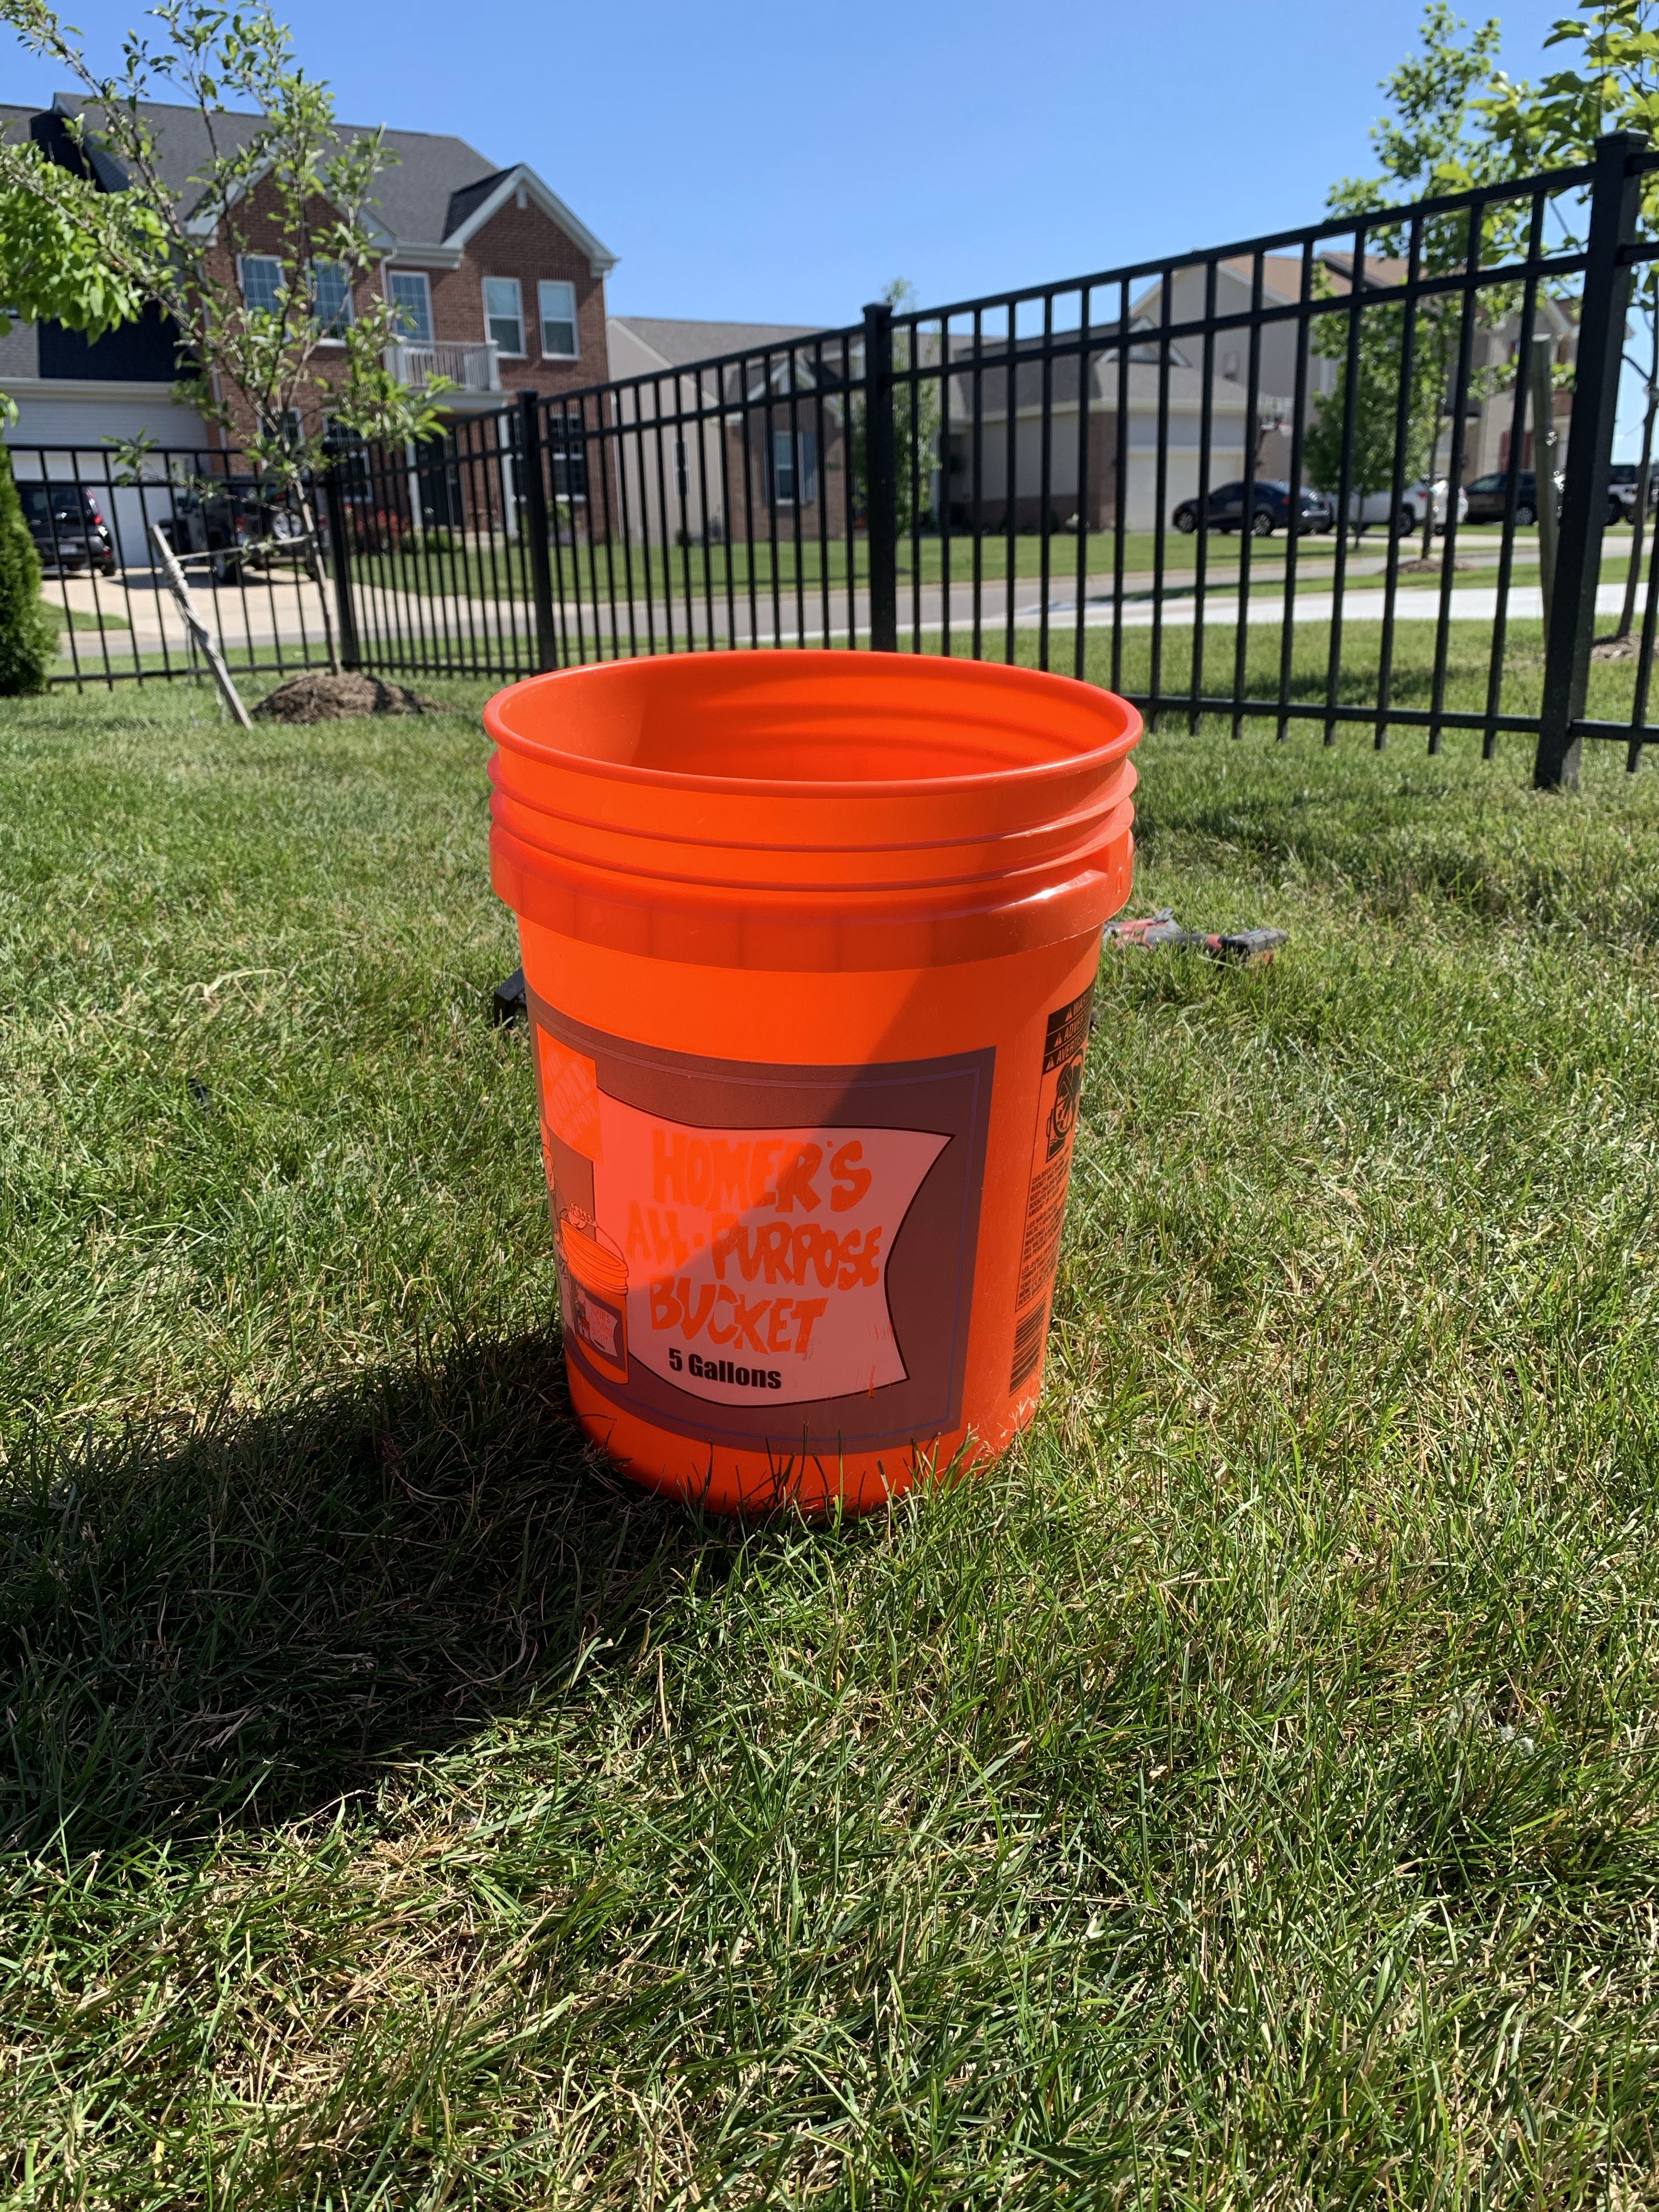
Our first step was digging four holes, in each corner of our play area. Once they were dug we dropped the Home Depot buckets in, and mixed cement in each bucket.
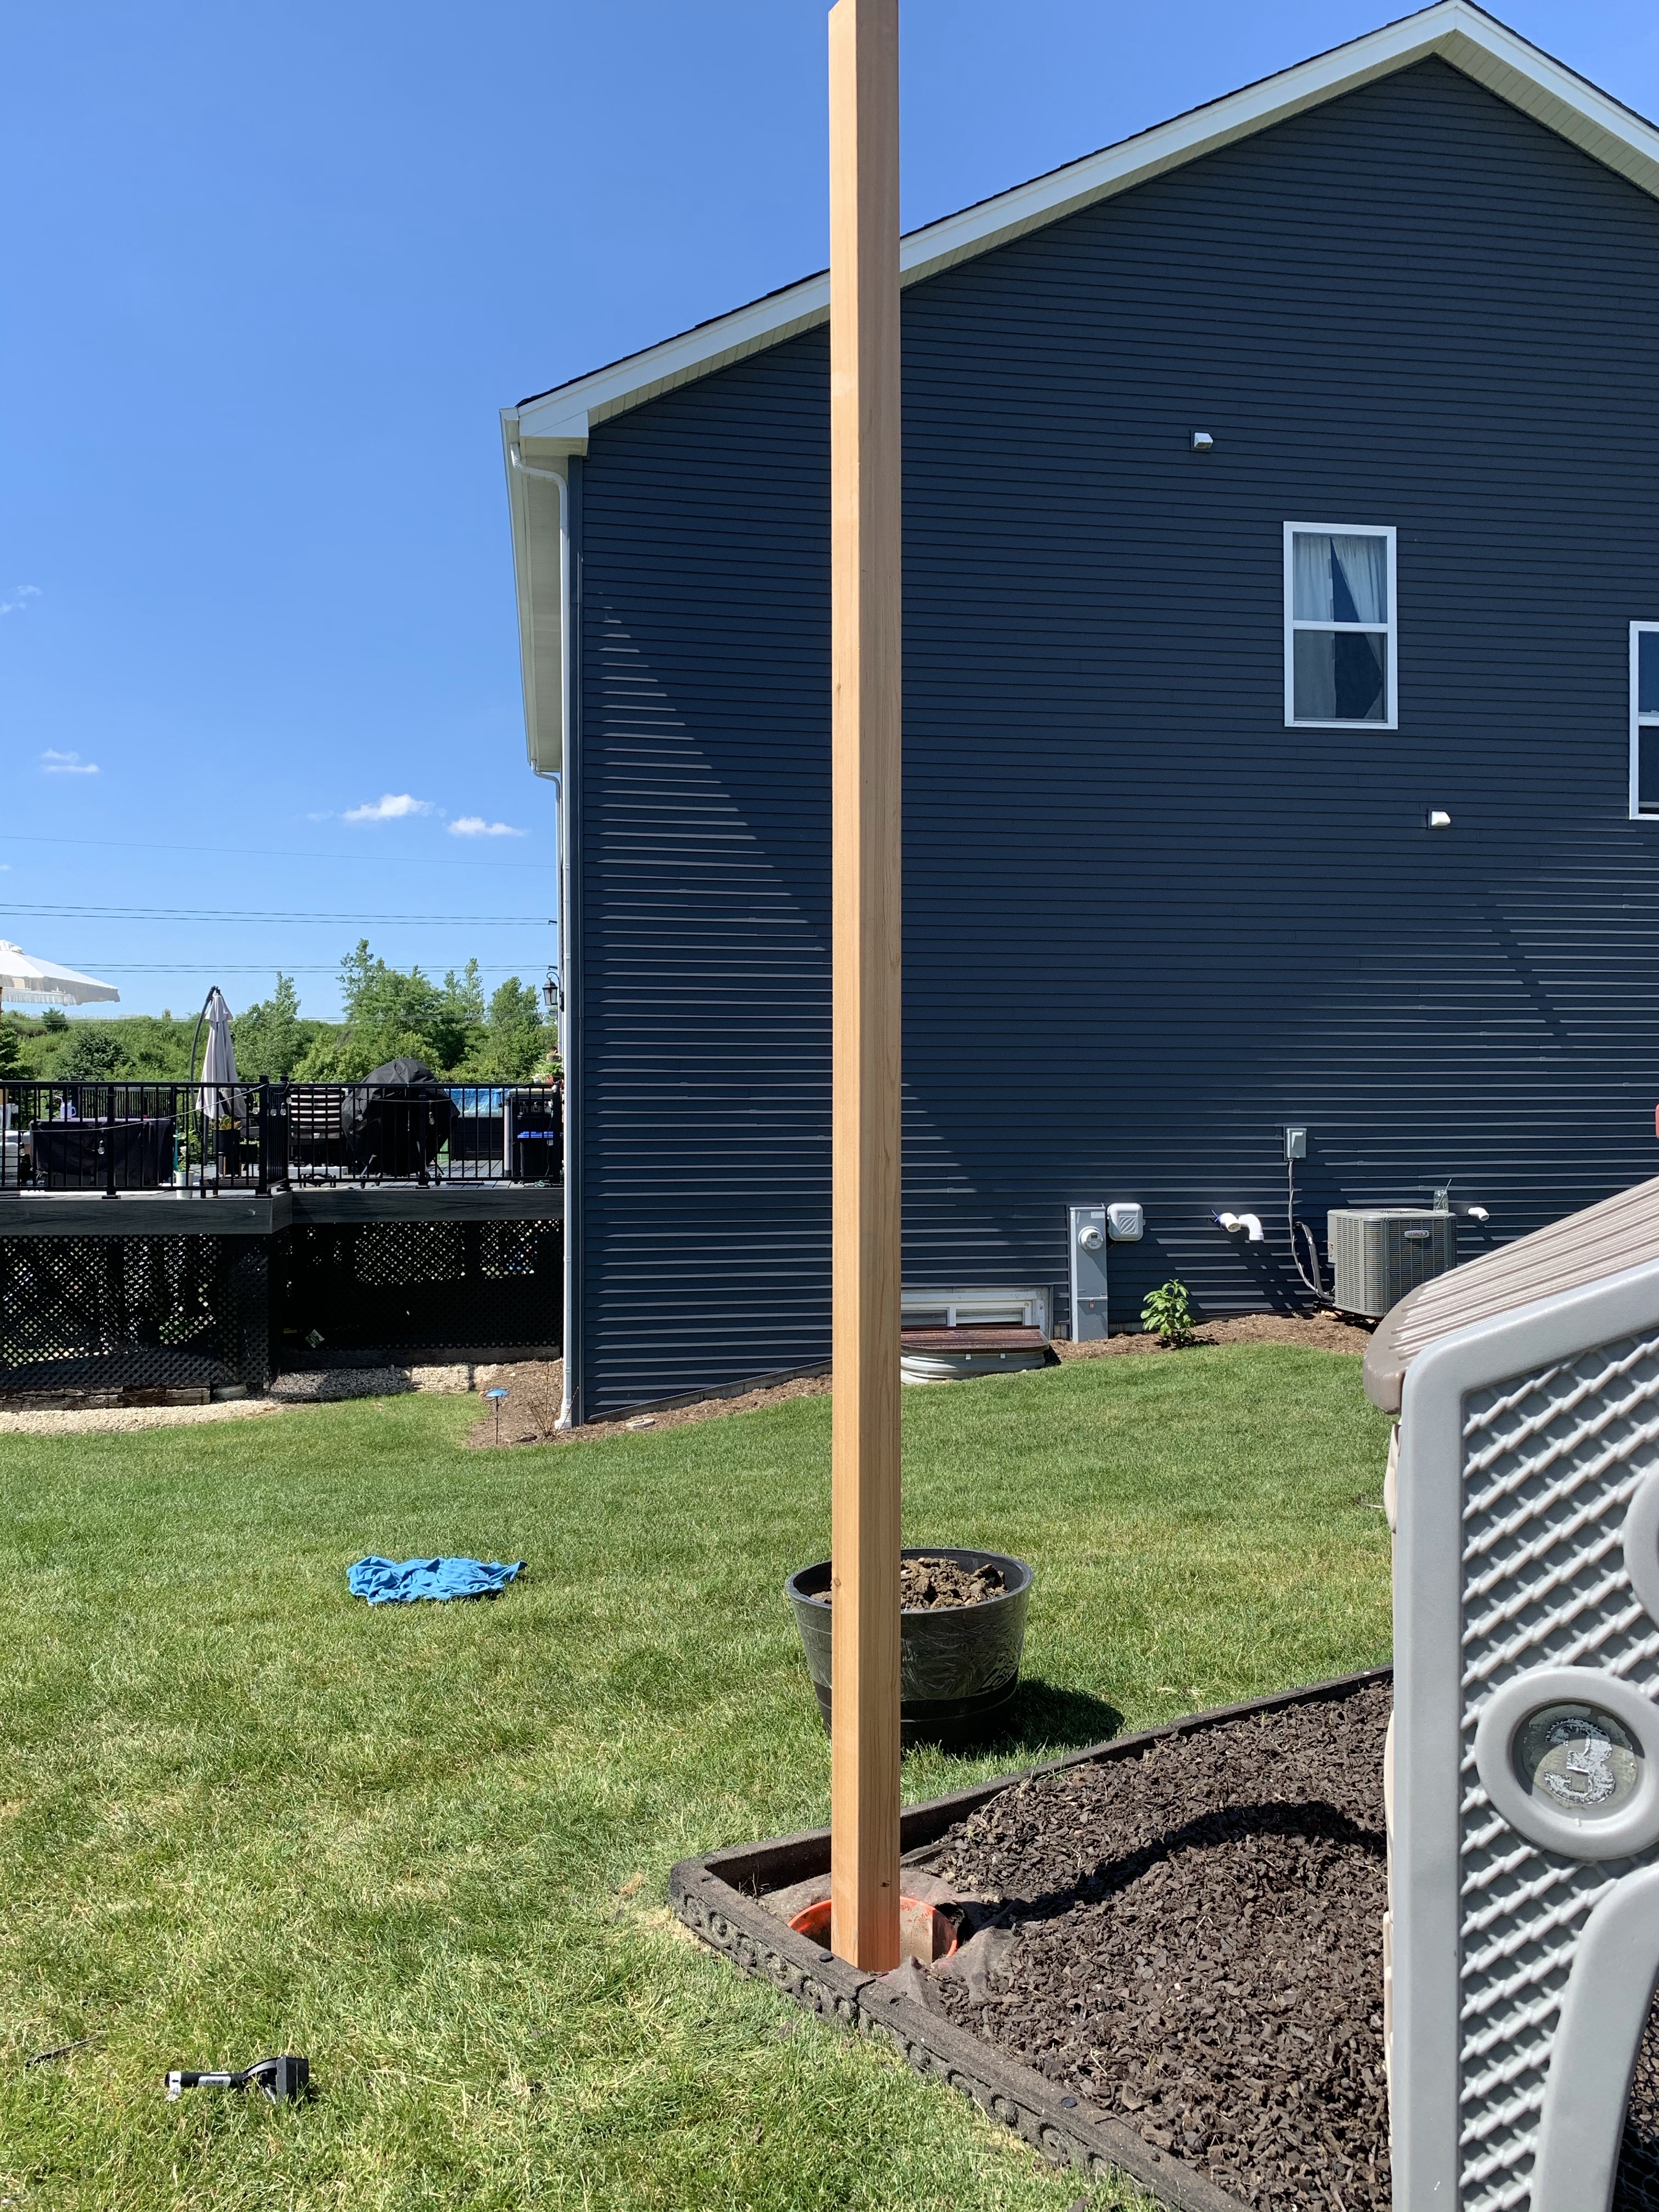
Cement was mixed, and then we added each of the cedar wood posts to each cement filled bucket, before it set.
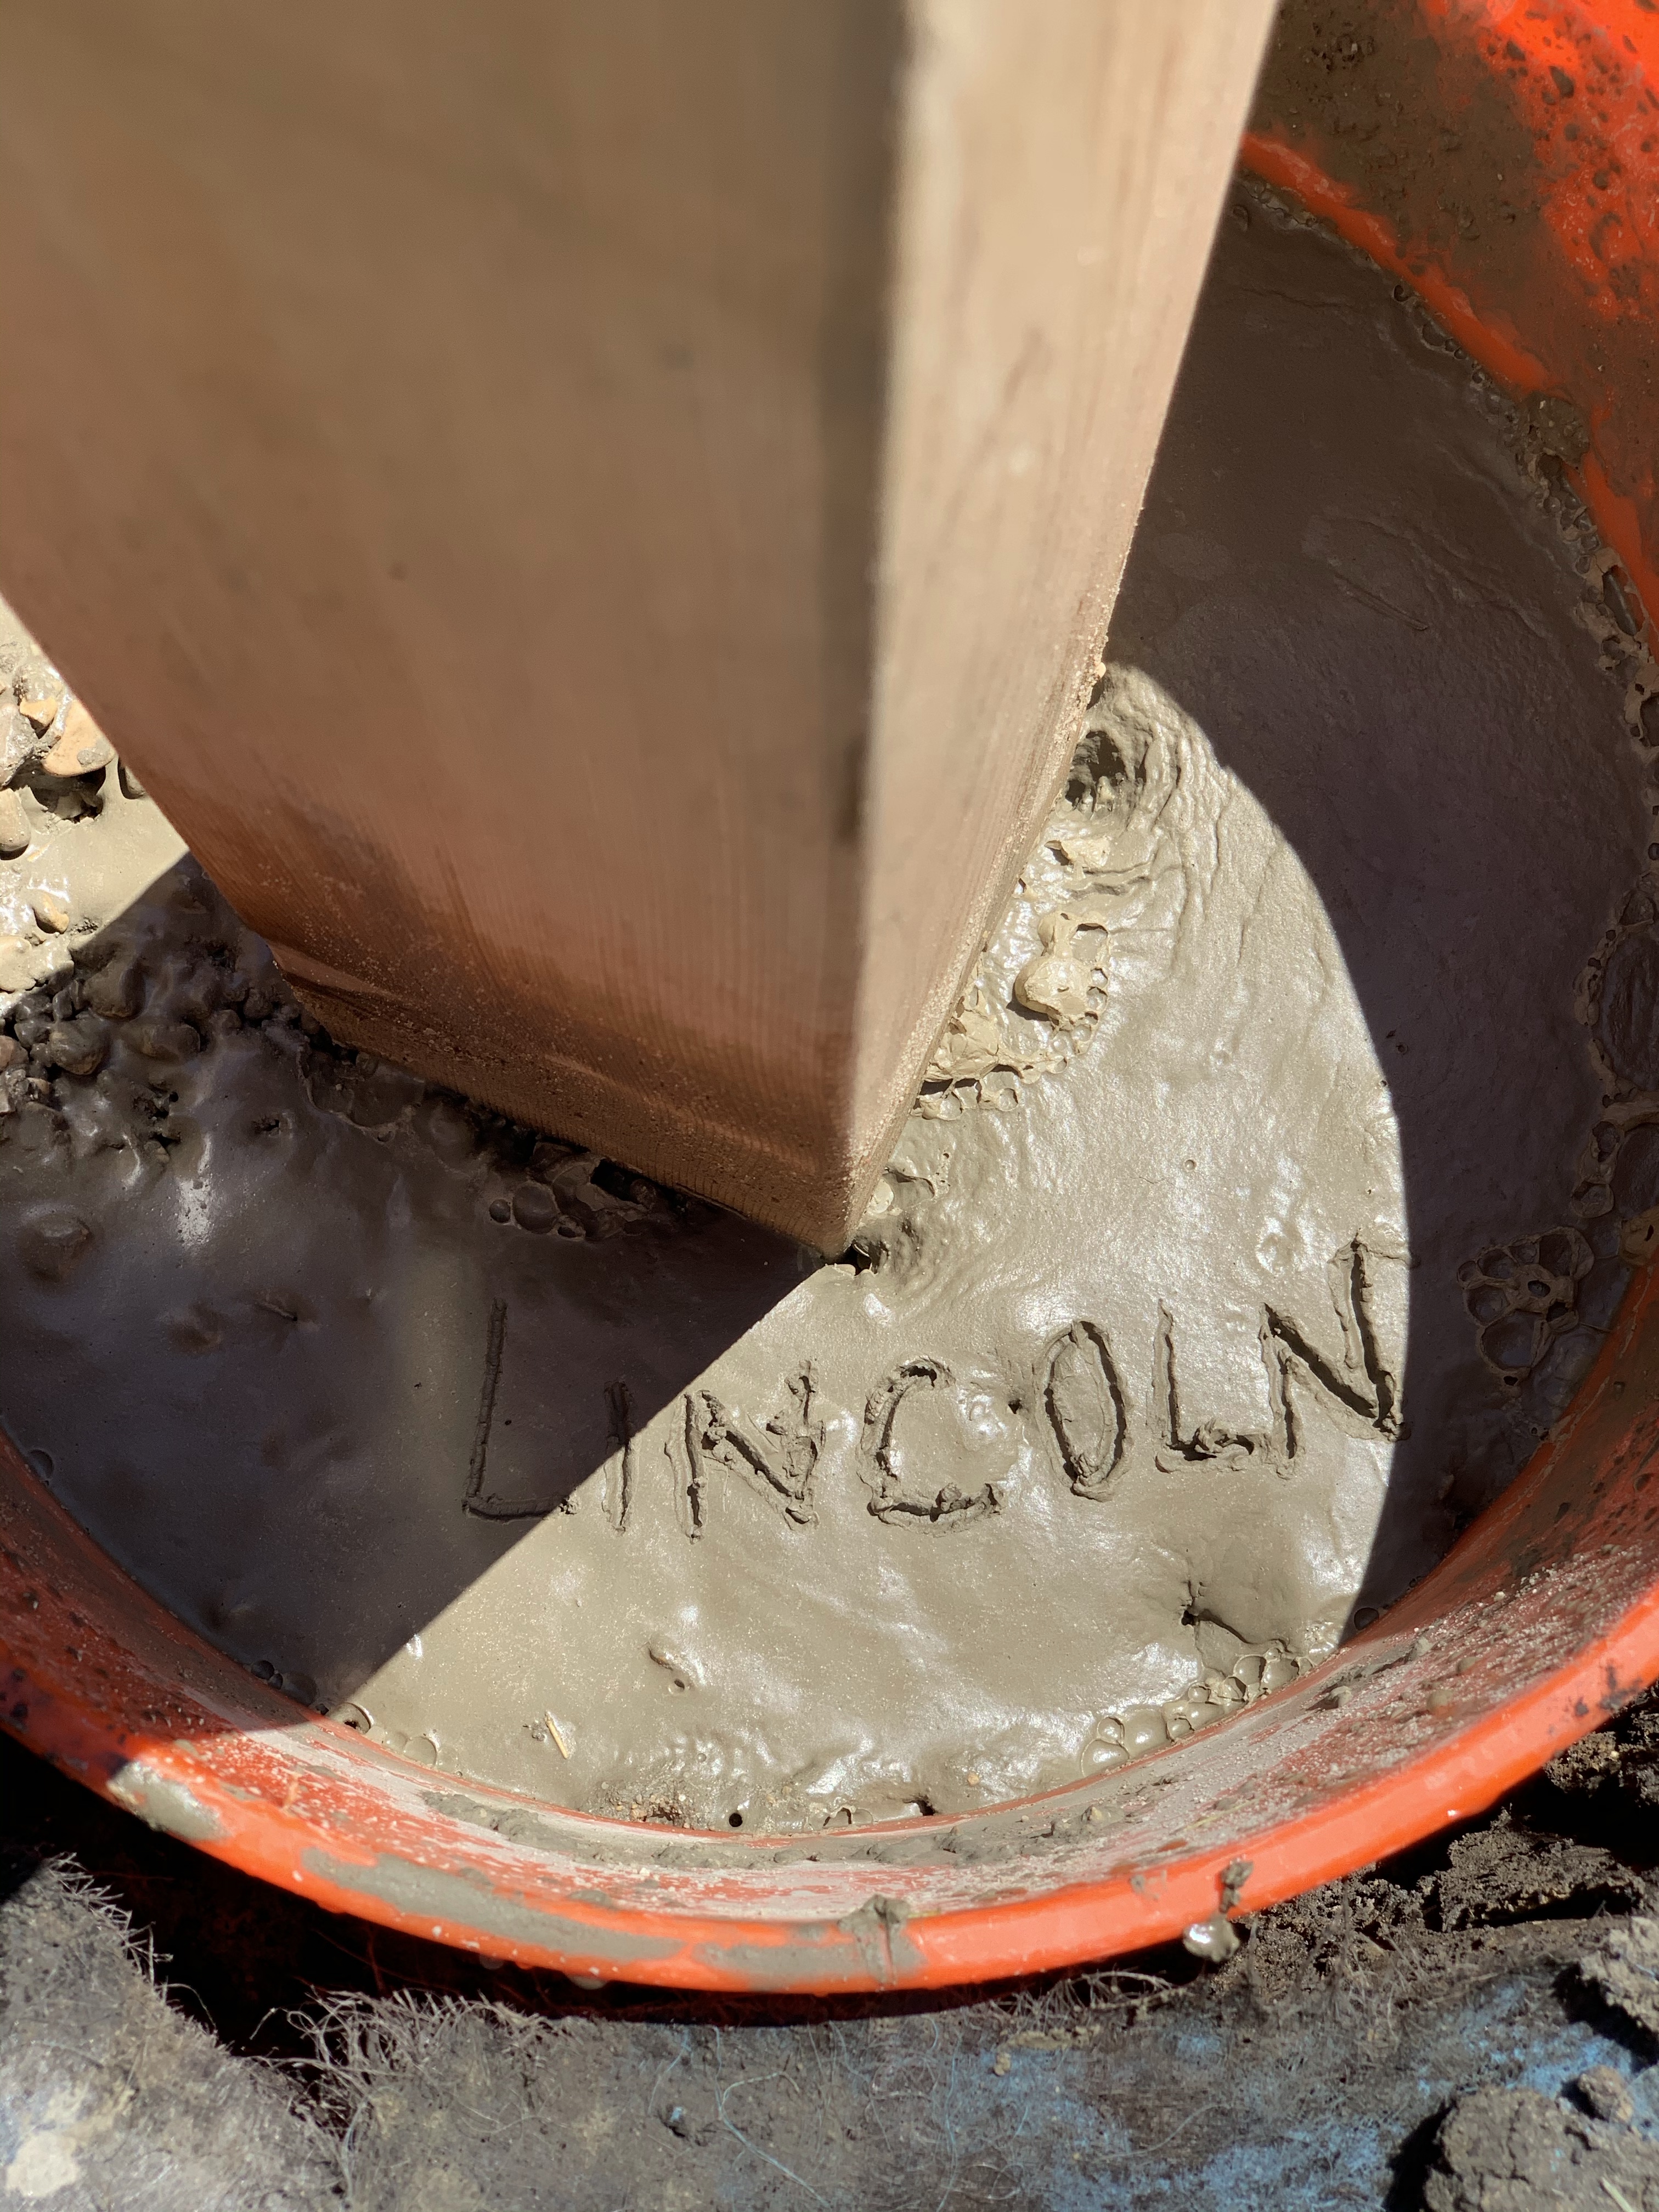
Then the kids got to put there initials into each one of the posts, which I just loved!
Planters
Holes dug, buckets and cement done, and posts in! Let’s talk about the planters! I found 4 extra large plastic barrel planters. We live in a very windy area, so we didn’t put cement into the planters, because they would still blow over. And we didn’t want to put cement directly into the ground, because one day the swingset won’t be here.
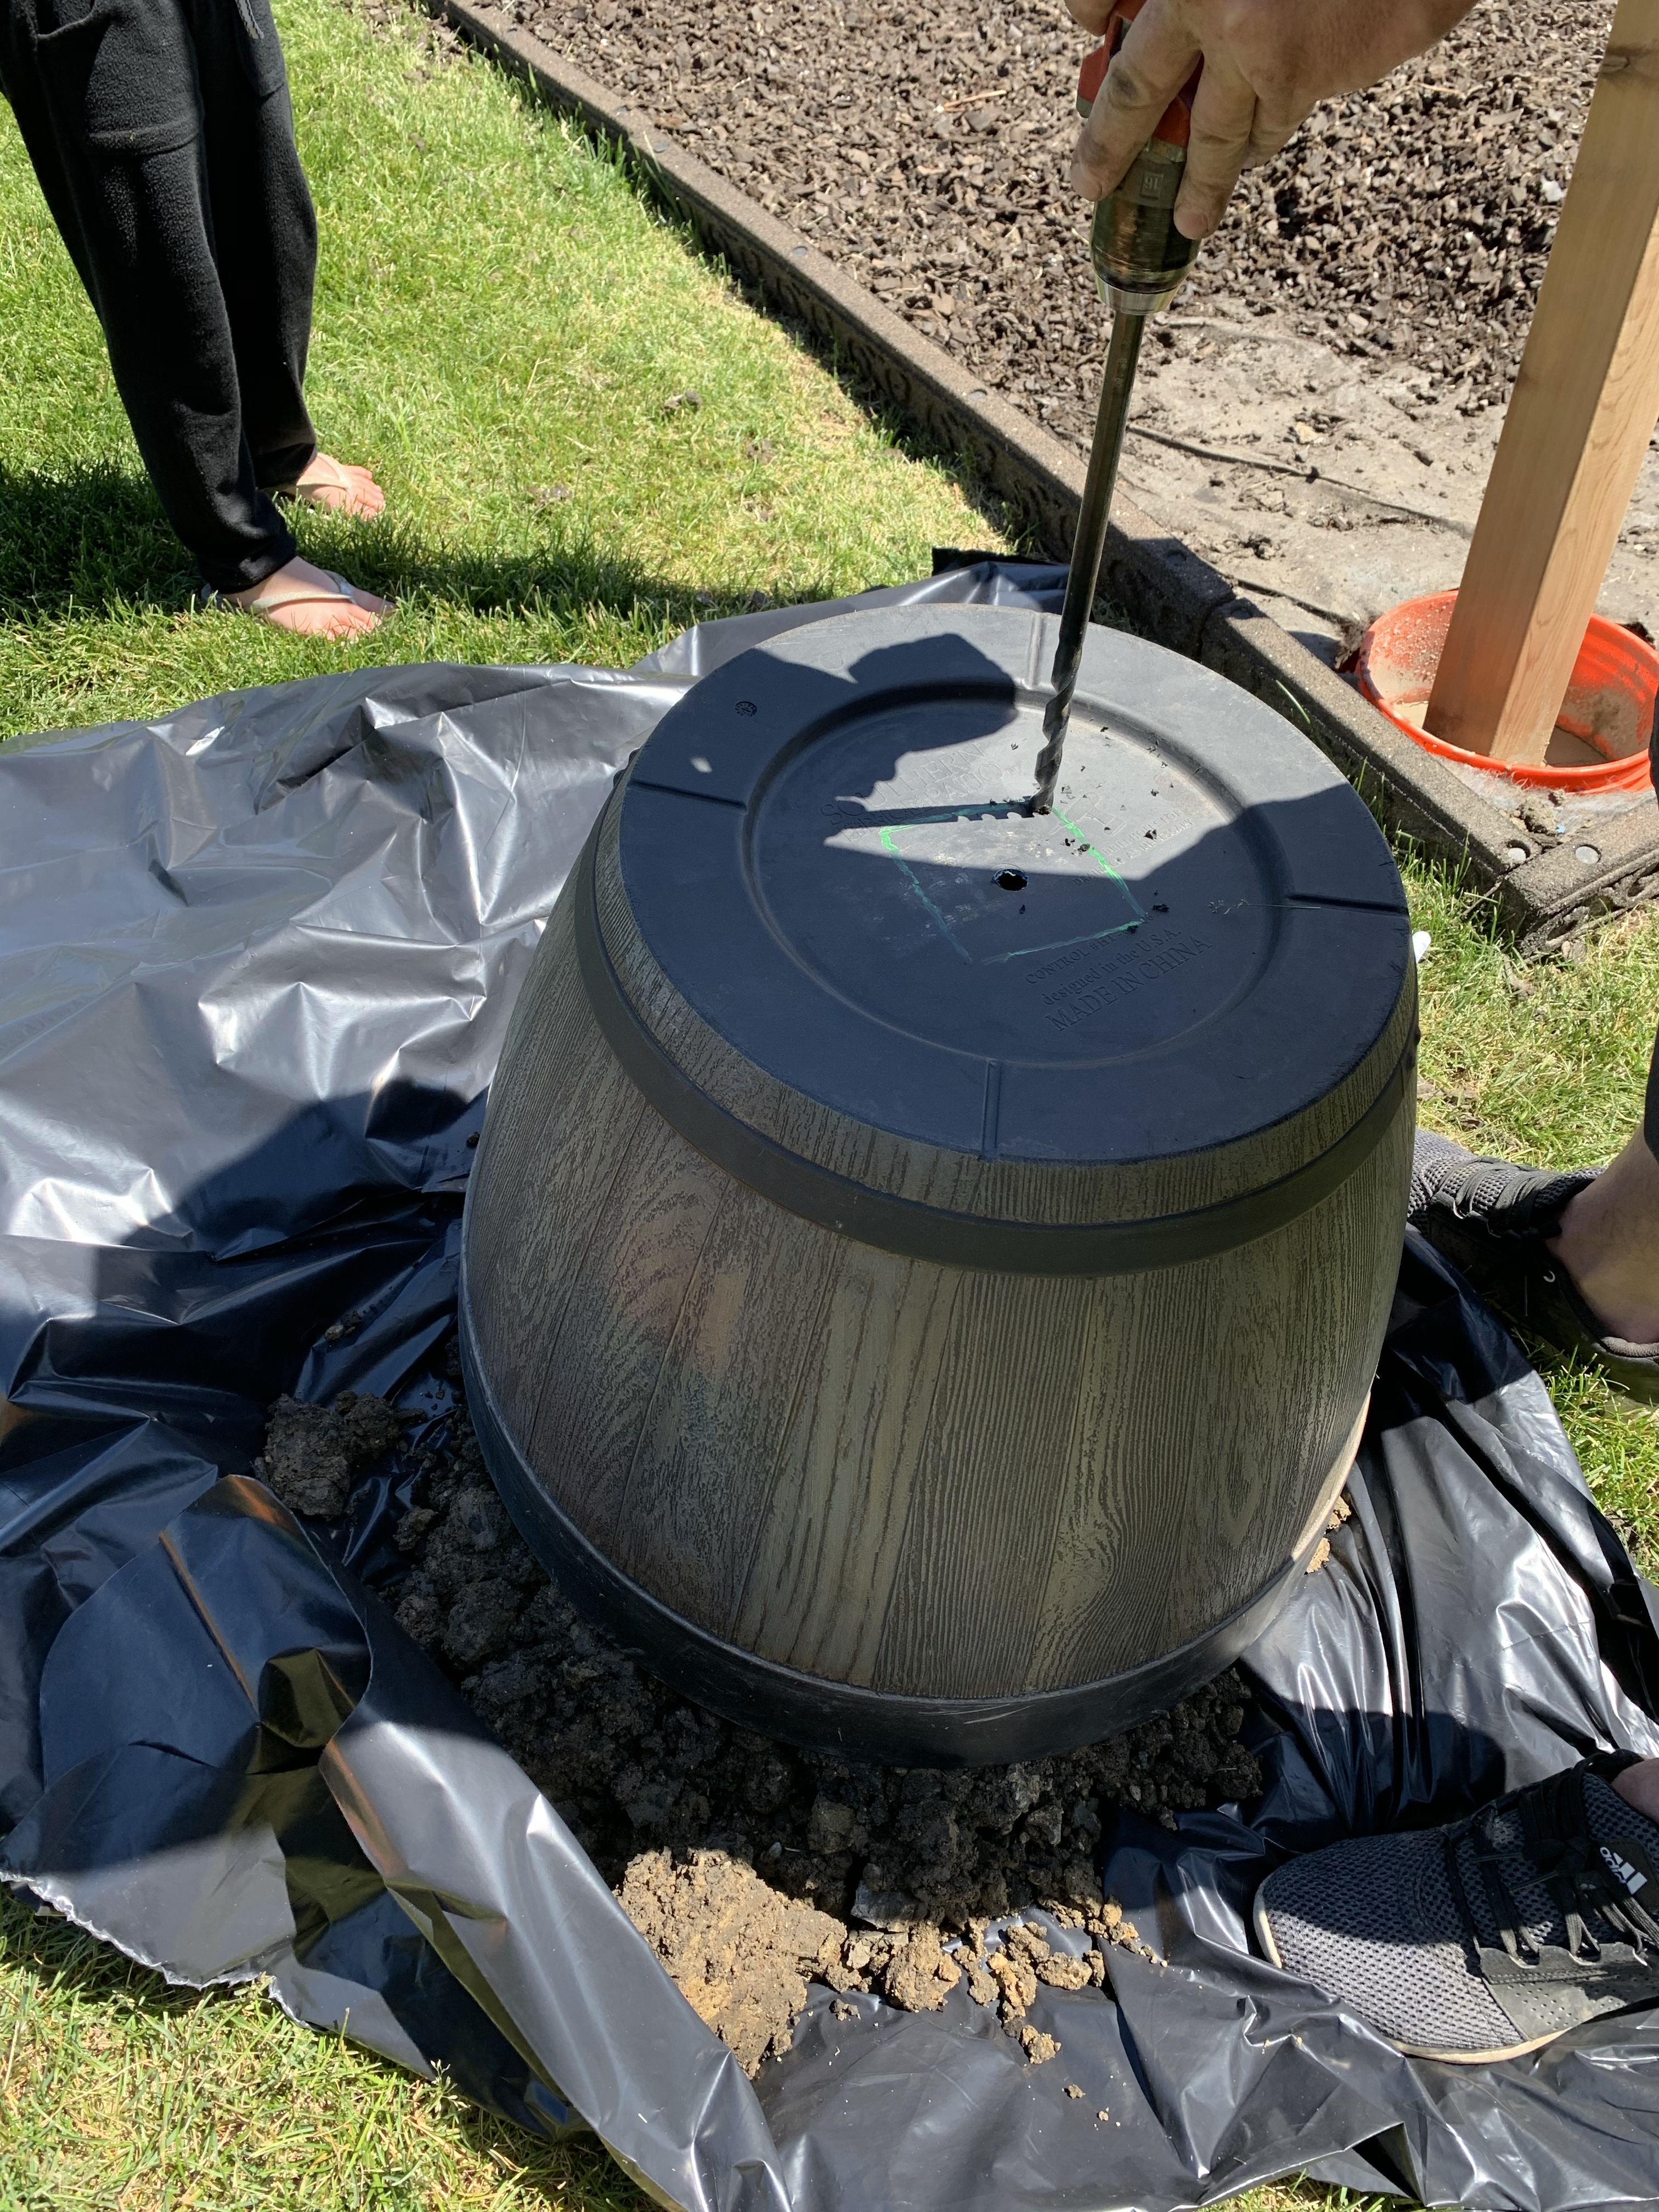
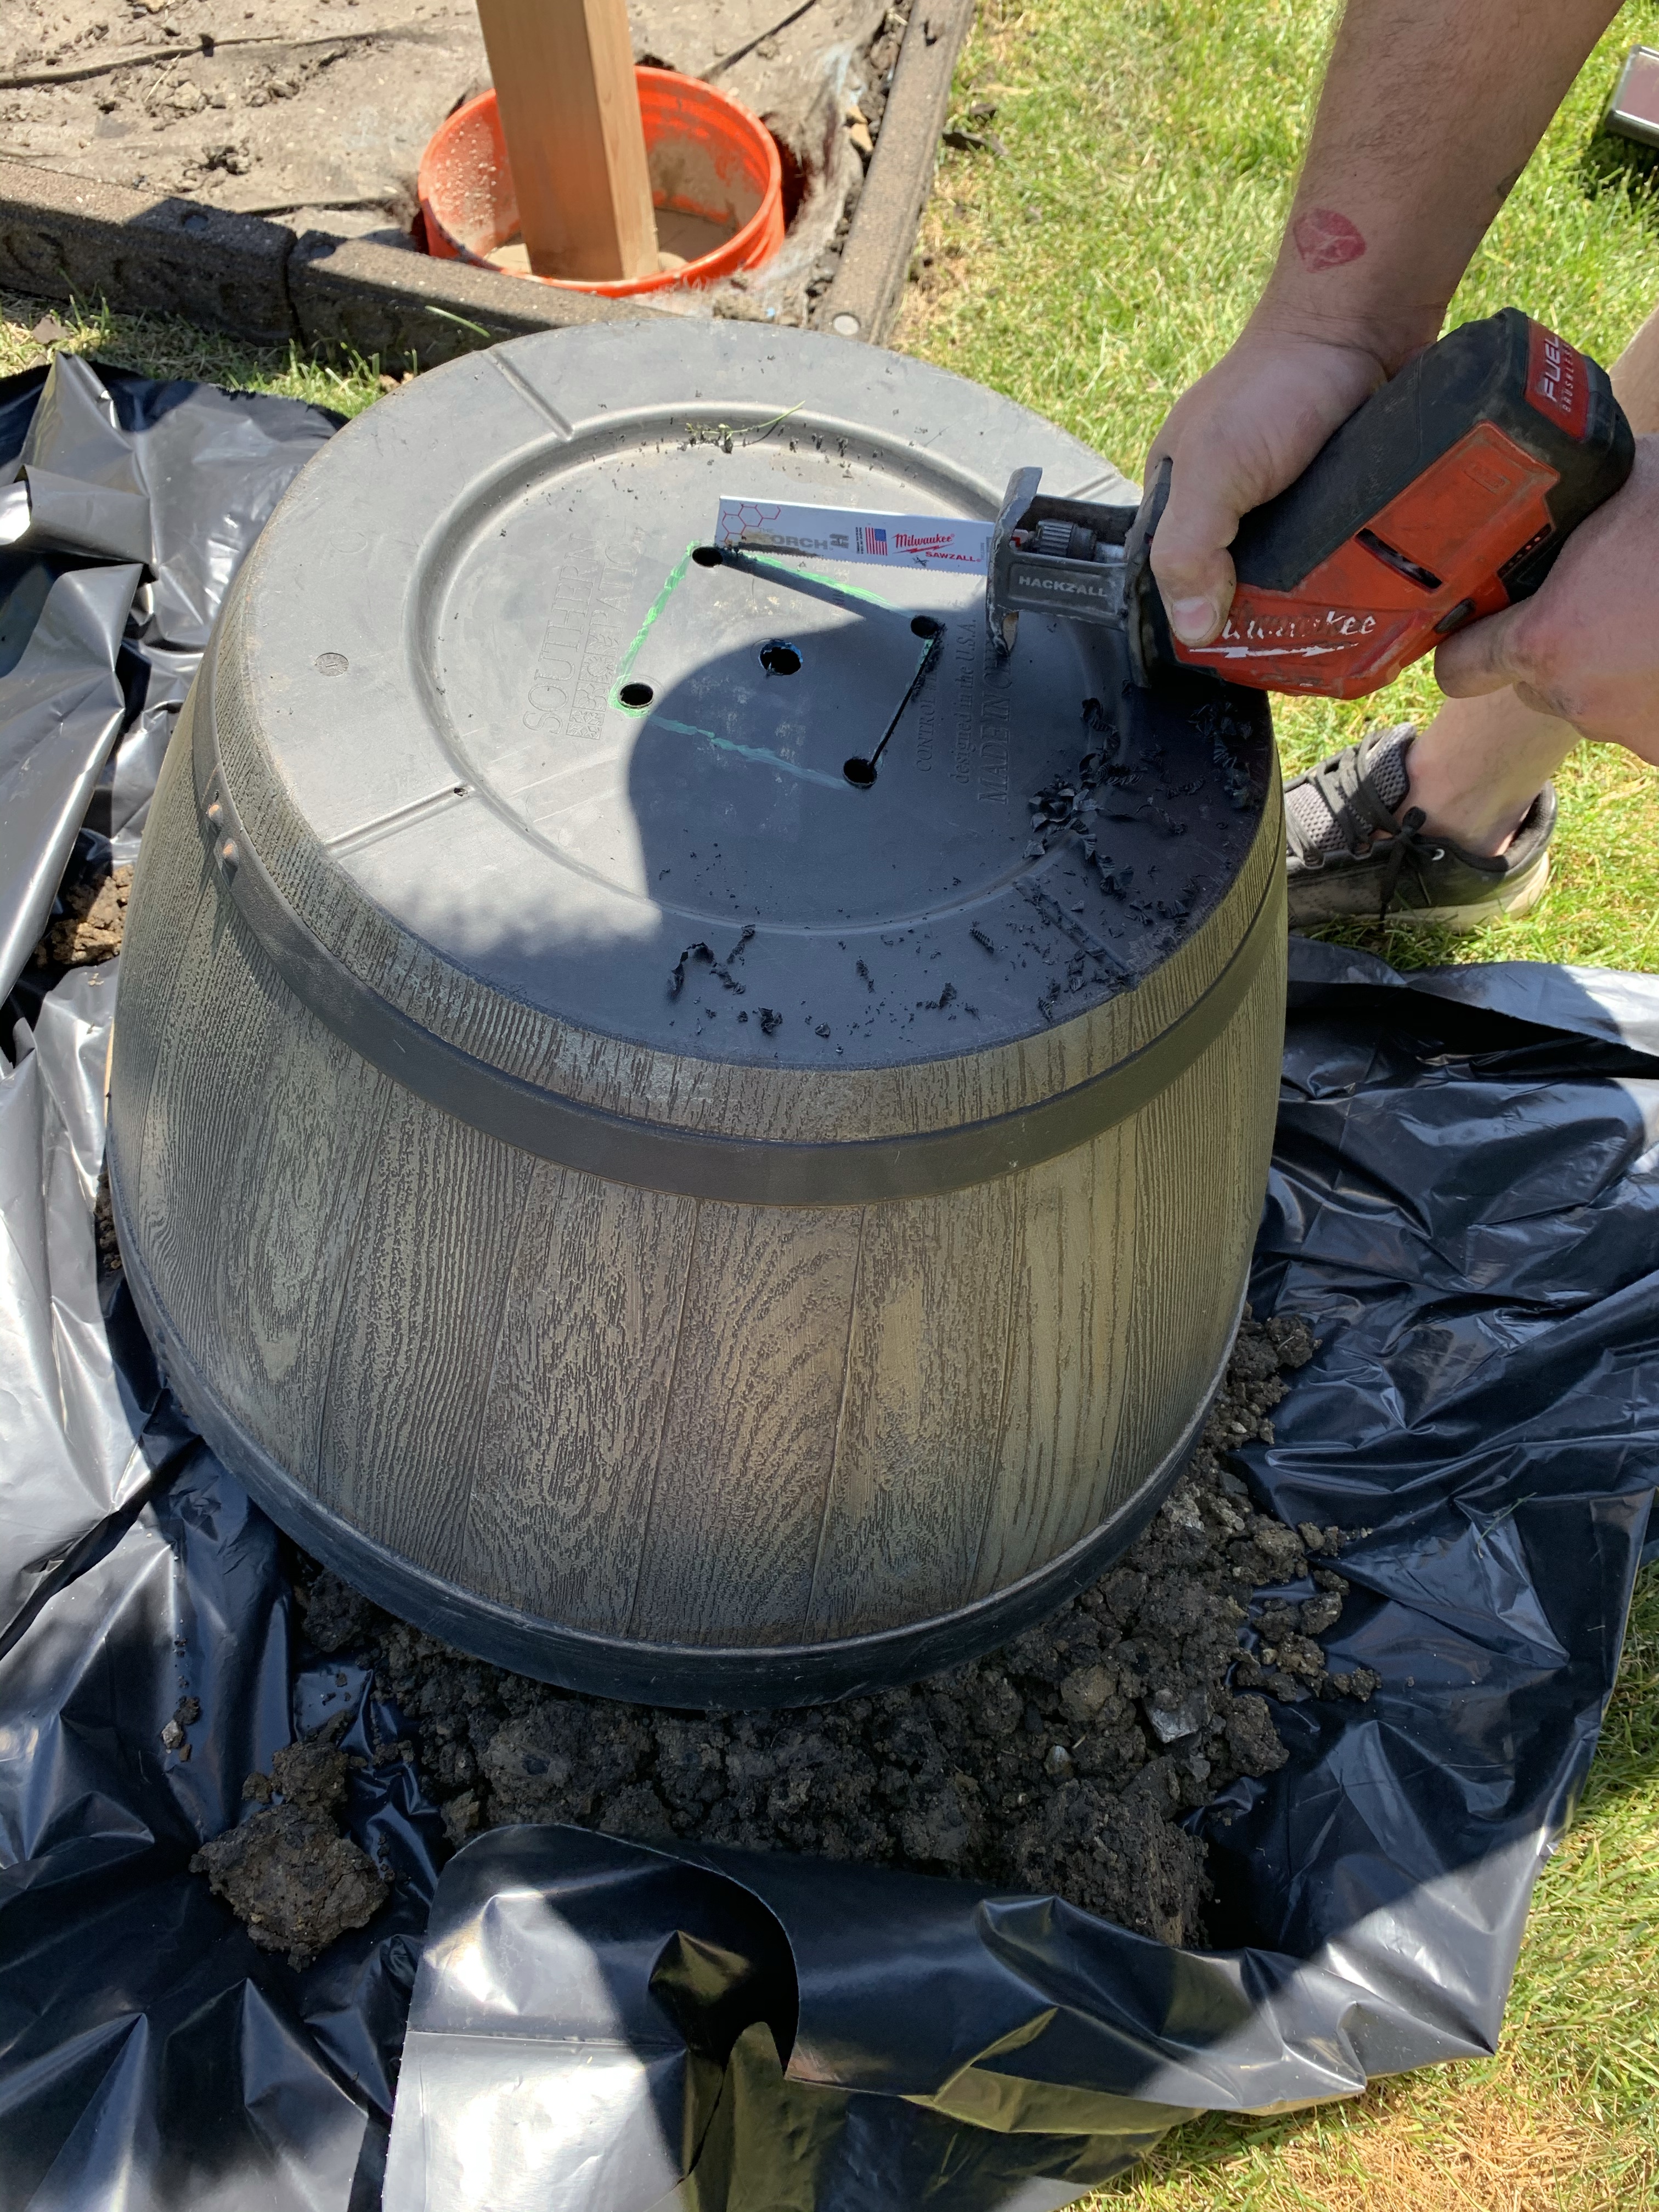
Cutting square holes into the bottom of each planter and simply sliding them over the top of the cedar post. Adding the dirt we dug to make the holes for the posts.
Hanging the lights
Posts and cement were set, and the cement dried so fast! Time for the lights! The solar panels fit perfectly on to the tops of each of the cedar posts, and they were screwed into the top to secure them.
Wrapping each strand around the tops of each post a few times worked perfect for us!
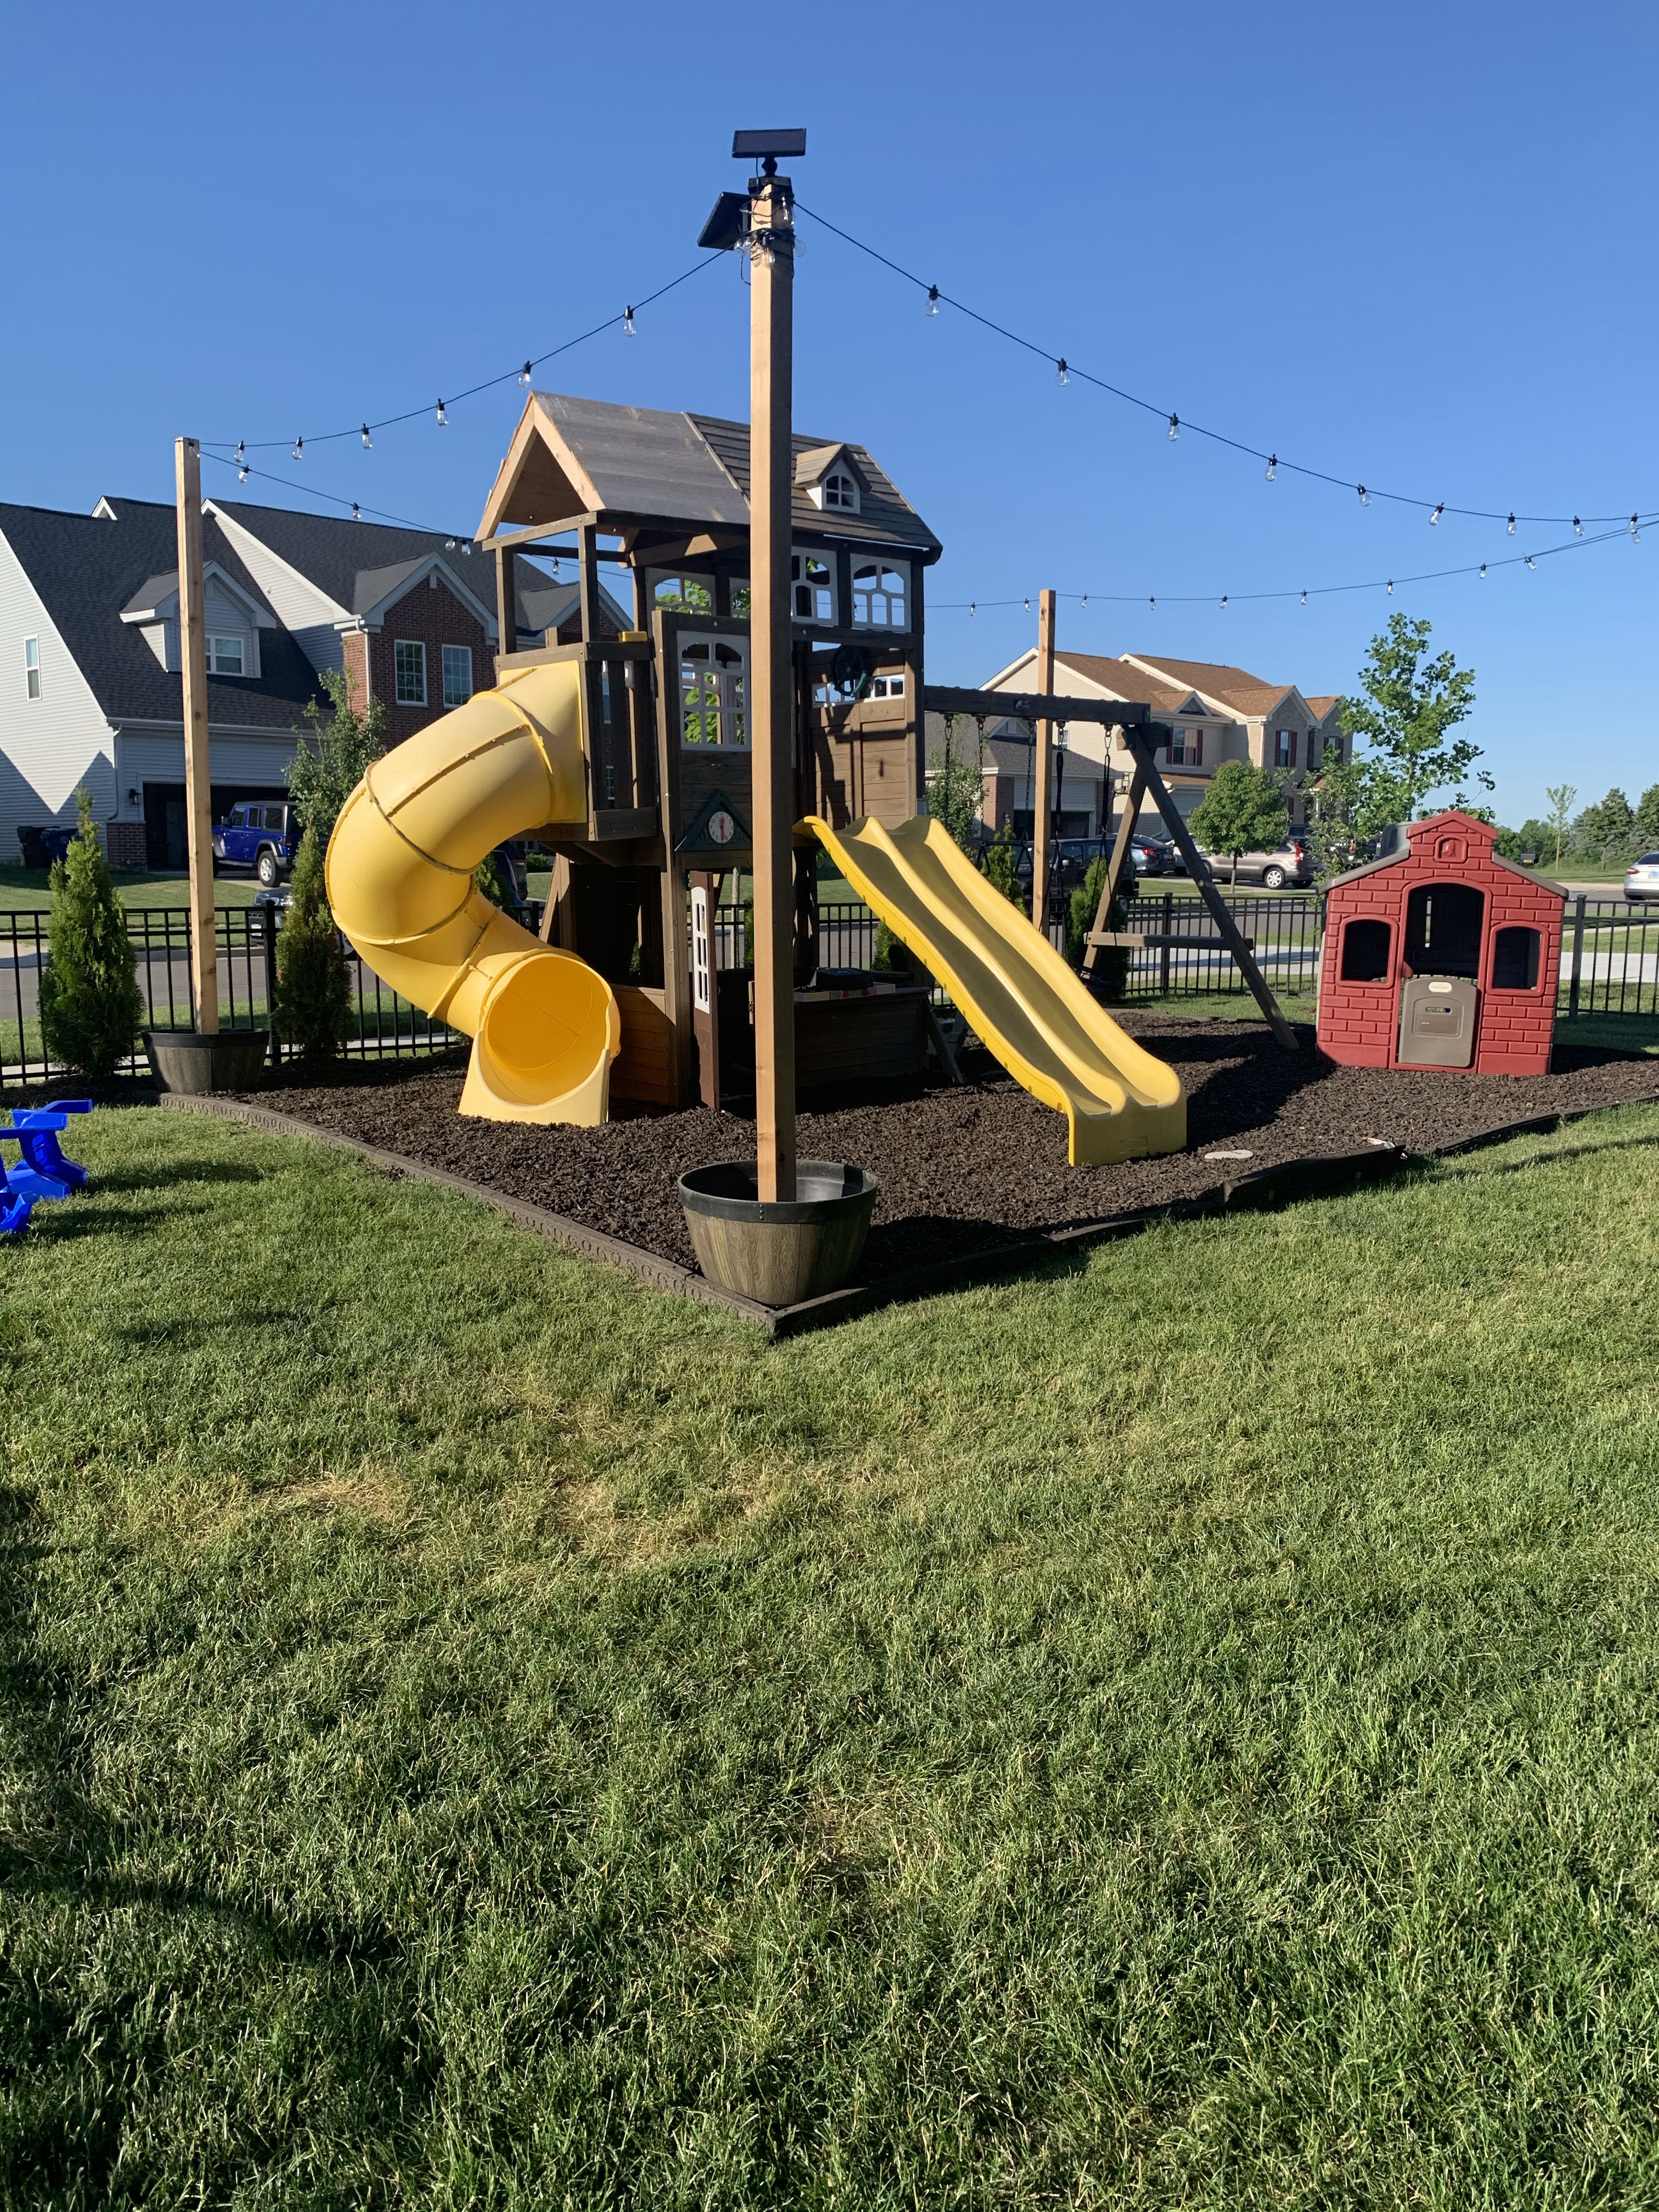
A Year Later
A year later and I’m still just as happy with how this project turned out! The money we invested into it was totally worth it. And it makes the summer nights that much magical!